Acid cleaning tiles is not your everyday cleaning method. Think of it as a powerful tool you use for tough problems that regular cleaners can't handle. We're talking about issues like the chalky white film from efflorescence, hard mineral deposits, rust stains, or the haze left after a new grout job.
This is a special treatment, not a routine task. The goal is to restore tile surfaces that are heavily stained or dirty, bringing them back to life when nothing else has worked. This guide will walk you through acid cleaning tiles safely, especially for homes in the Bay Area dealing with coastal conditions.
When Is Acid Cleaning the Right Choice?
Before reaching for an acidic cleaner, know that this is a corrective step, not a maintenance one. Your first defense should always be regular cleaning. For tips on that, check out our guide on 5 amazing tips for cleaning tile. But when standard methods fail, acid cleaning is the next step.
So, when is it the right time for such a strong cleaning?
Identifying the Right Kind of Problem
Some issues are perfect for an acid treatment. Here in coastal areas like Monterey, we often see mineral-rich water that leaves stubborn deposits. If you notice these specific problems, an acid wash is likely your best solution:
- Efflorescence: This is the powdery, white stuff you see on tile and grout. It's left behind when moisture evaporates. Acid is great at dissolving these mineral salts.
- Grout Haze: Did you just install new tile? Sometimes a cloudy film of grout is left on the tile surface. A mild acid, like sulfamic acid, can remove it without harming the tile.
- Hard Water Stains: These build up over time, especially in bathrooms and kitchens. Some of the best strategies for removing hard water stains use acidic solutions to break down the minerals.
- Deep-Set Rust Stains: For tough rust marks that other cleaners can't remove, phosphoric acid can work wonders.
This targeted cleaning approach is growing in popularity. The global tile cleaner market was valued at USD 2.8 billion in 2023 and is expected to grow as homeowners focus on proper maintenance. You can see more details on the tile cleaner market's growth over at Dataintelo.com.
Before you start, you must know if your tile can handle an acid wash. Some materials will be permanently damaged by it.
Acid Wash Suitability by Tile Type
Here is a quick table to help you see if an acid wash is safe for your tile. Always test a small, hidden area first, no matter what this chart says!
| Tile Material | Safe for Acid Wash? | Key Considerations and Cautions |
|---|---|---|
| Porcelain & Ceramic | Yes (Generally) | These are durable and usually safe. Use a mild acid and always test an inconspicuous spot first. |
| Granite | Yes (With Caution) | Granite can handle mild acids, but make sure the sealer is intact. Acid can strip sealants. |
| Slate | Yes (With Extreme Caution) | Only use a very diluted, mild acid. Slate is porous and can be sensitive to harsh chemicals. |
| Marble | NO | Never use acid on marble. It is a calcium carbonate-based stone and will etch, dull, and dissolve. |
| Limestone | NO | Like marble, limestone is calcite-based and will be permanently damaged by acid. |
| Travertine | NO | Another calcite-based stone. Acid will cause severe etching and pitting. Avoid completely. |
| Concrete Tiles | NO (Unless intended) | Acid will etch and change the surface of concrete tiles. This is sometimes done on purpose for a specific look, but it's a job for a pro. |
Ultimately, using acid is all about knowing your material. When in doubt, call a professional. It's better to be safe than to accidentally ruin a beautiful floor.
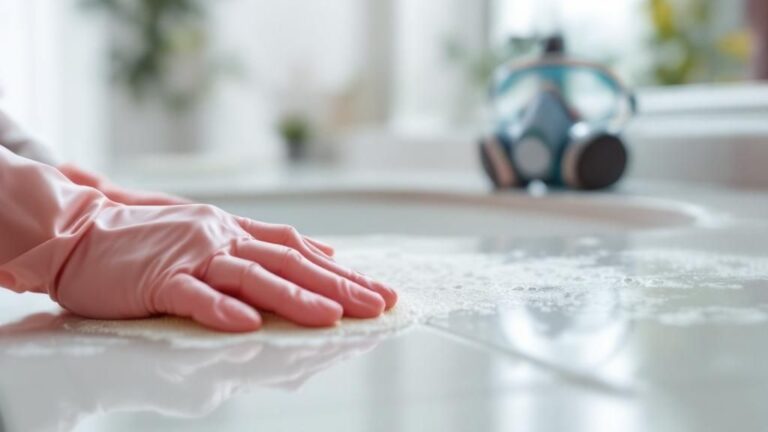
Gathering Your Safety Gear Before You Start
Before you use any acid, we need to talk about safety. This is not just a suggestion; working with acids is serious and requires respect. This step is not optional.
You wouldn't grab a hot pan without an oven mitt. You should not handle acid without the right personal protective equipment (PPE). Standard kitchen gloves and sunglasses are not enough. The goal is to create a complete barrier between you and the chemicals.
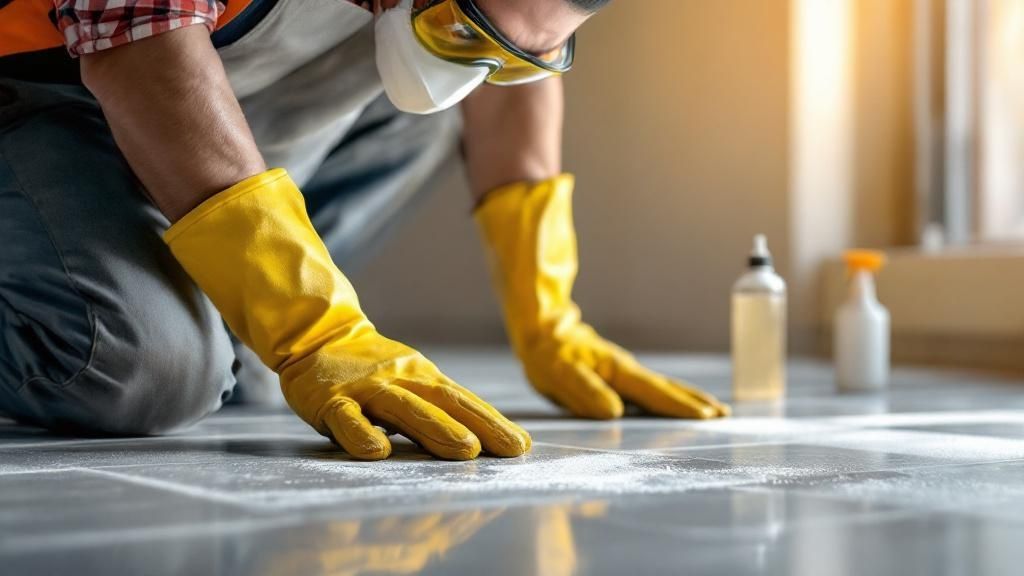
Your Personal Protective Equipment Checklist
Your safety gear is your most important defense. Rushing this can lead to serious injury. Take a few minutes to get everything together before you open the acid.
- Full-Coverage Safety Goggles: Get the kind that seal around your eyes. A small splash can cause permanent eye damage. Your regular glasses do not offer enough protection.
- Heavy-Duty, Acid-Resistant Gloves: Look for thick nitrile or rubber gloves. Thin latex or disposable ones will break down quickly.
- Respirator with Acid Vapor Cartridges: The fumes from these cleaners can damage your lungs. A simple dust mask is useless. You need a proper respirator rated for acid vapors.
- Full Skin Coverage: Long sleeves, long pants, and closed-toe shoes are a must. Rubber boots are even better if you have them. Any exposed skin is a target for chemical burns.
Safety First Takeaway: The biggest mistake people make when acid cleaning tiles is not using the right PPE. Spending a few extra dollars on the right gear protects your health.
Preparing Your Workspace and Emergency Supplies
Once you are suited up, secure the area. This will protect your home from damage and prepare you for any accidents. In well-designed homes across the Bay Area, fixtures and custom finishes are valuable. Knowing how to choose bathroom tile is one thing; protecting the area during a deep clean is just as important.
First, get some good ventilation. Open every window and set up a fan to pull fumes outside. Do not just circulate them in the room.
Next, use plastic sheeting and painter’s tape to cover anything you don't want the acid to touch. This includes metal fixtures, stainless steel appliances, and wood trim. The fumes alone can cause damage.
Finally, have an emergency kit ready. Keep a large bucket of clean water and a box of baking soda nearby. If any acid spills, you can immediately pour water on it and then sprinkle baking soda to neutralize the reaction.
Choosing the Right Acid and Diluting It Safely
Not all acid cleaners are the same. Picking the right one for your tile and stain is key to getting great results without damaging your floors. You need to know what you are working with before you start.
This is why the professional tile and grout cleaning market, valued at USD 2.5 billion in 2024, is growing. Pros know that the right acid can erase tough stains. You can learn more about the growth of the professional cleaning market here. For a DIY job, you need to be just as careful.
Comparing Common Acids
Think of acids as different tools. You wouldn’t use a sledgehammer to hang a picture. Each type of acid cleaner has its own specialty and risks.
To make things clearer, here is a quick list of the most common acids for tile cleaning.
Common Acids for Tile Cleaning at a Glance
| Acid Type | Best For | Strength | Safety Notes |
|---|---|---|---|
| Muriatic Acid | Extreme efflorescence, concrete residue on non-porous tile | Very High | Produces strong fumes; needs maximum ventilation and PPE. Handle with extreme care. |
| Phosphoric Acid | Rust stains, hard water deposits, general mineral buildup | Medium | A good all-around choice. Milder than muriatic but still needs full safety gear. |
| Sulfamic Acid | Grout haze after new tile installation, light mineral stains | Low-Medium | Often comes in crystal form. Considered safer with fewer fumes, making it good for DIYers. |
Choosing the right acid depends on the stain and your tile type. Always start with the mildest option that you think will work.
The Golden Rule of Dilution
Once you have your acid, you have reached the most critical safety step: mixing it. There is one rule you must follow to prevent a dangerous chemical reaction.
Always add the acid to the water—never the other way around. Pouring water into concentrated acid can create a lot of heat instantly. This can cause the mixture to boil and splash dangerous chemicals onto you.
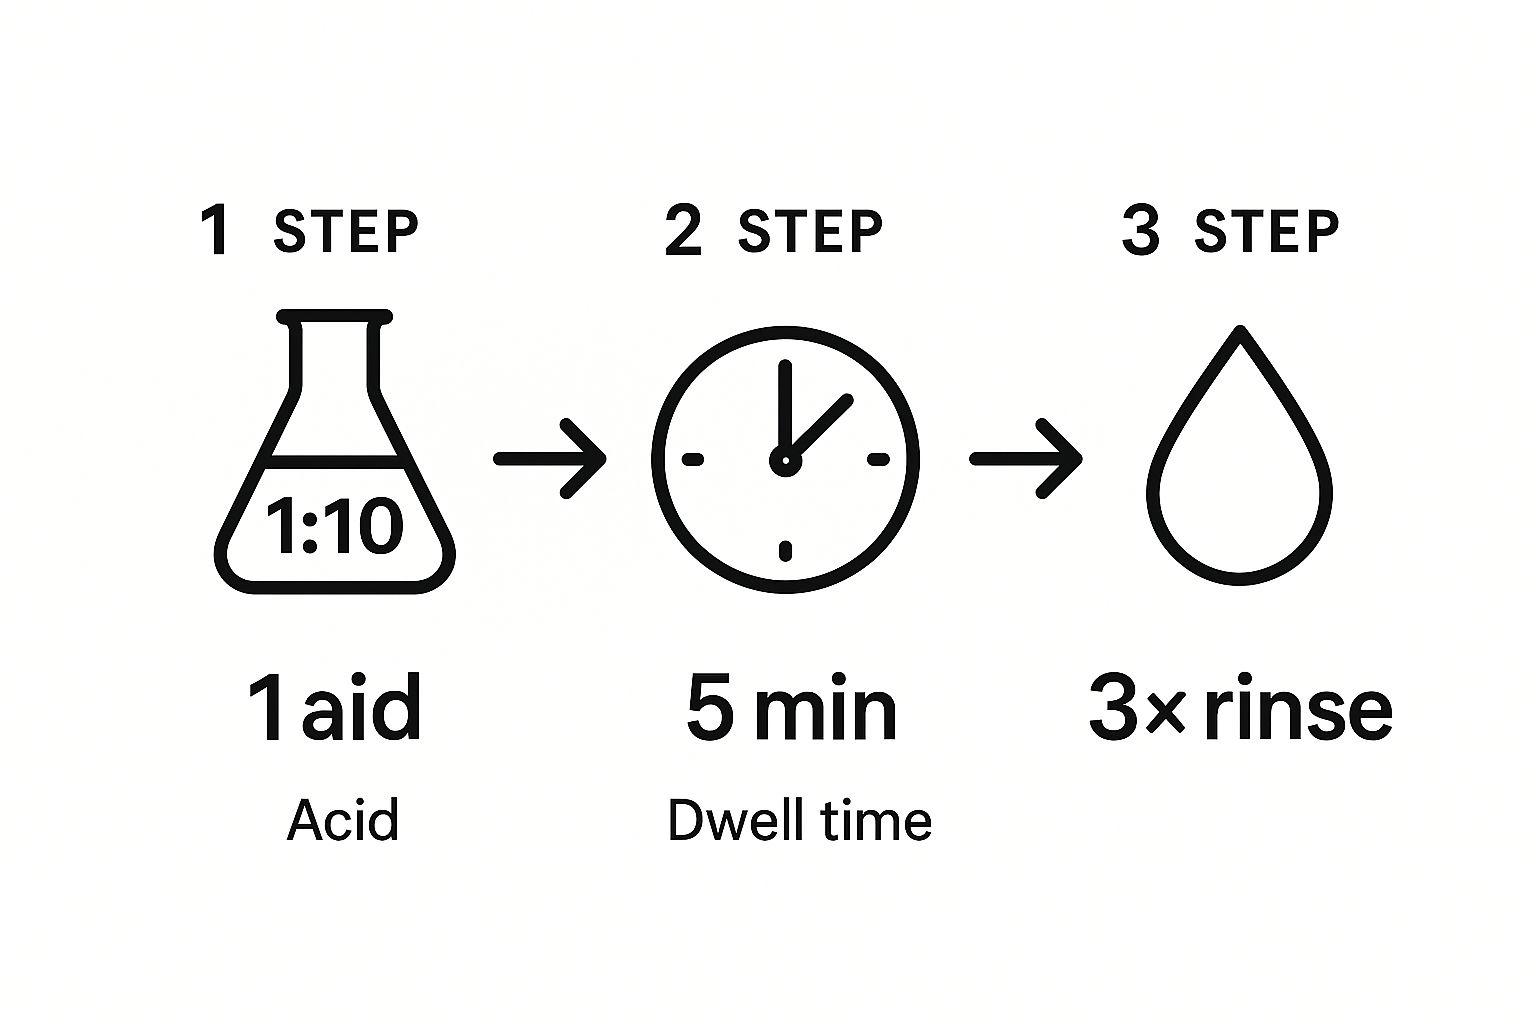
So, how much do you dilute? The ratio depends on the acid’s strength and the stain. A good starting point for most jobs is a 1:10 ratio. That’s one part acid to ten parts cool, clean water.
For tough jobs, you might need a 1:5 ratio. But always start with the weaker solution and test it on a hidden spot first. This simple test protects your tile from damage.
A Practical Walkthrough of the Application Process
You have your gear on and the acid is mixed. Now the real work begins. The very first thing you need to do is pre-wet the entire tile surface with clean water.
Do not skip this step. Soaking the surface first creates a protective buffer. This stops the acid from immediately soaking into the tile and grout. It keeps the acid working on the surface stains where you want it.
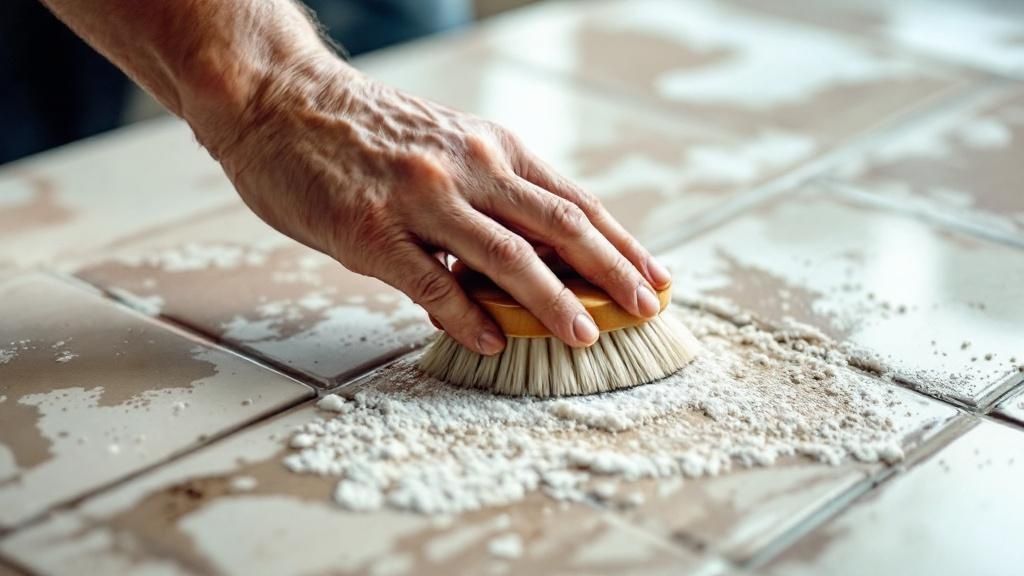
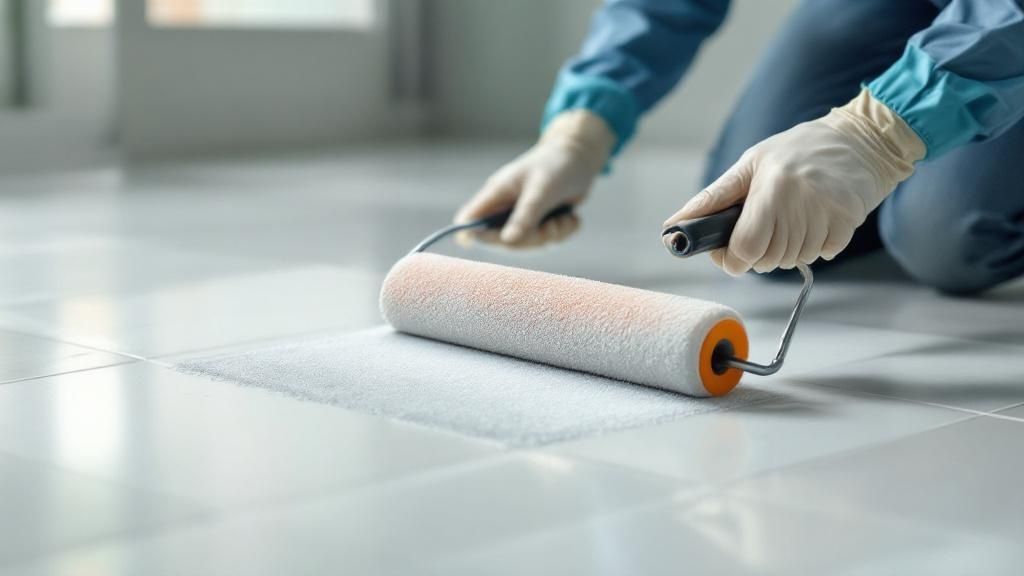
Applying the Acid Solution
With the floor damp, you can start applying your diluted acid. Work in small, manageable sections. Imagine your floor is a grid and focus on one 4×4 foot square at a time.
An acid-resistant garden sprayer is great for this, but a plastic watering can also works. Just make sure it has no metal parts, because the acid will corrode them. Once you've coated a section, it's time to scrub.
Use a stiff, non-metallic brush to gently scrub the wet area. This helps the acid break down and lift off the stains or grout haze. You should see some fizzing or bubbling—that's a good sign! It means the acid is working.
Managing Dwell Time
That fizzing brings us to dwell time—how long you let the acid sit on the tile. There isn't one perfect time, but a good starting point is 3-5 minutes.
The golden rule is to never let the acid solution dry on the surface. If an area starts to dry, mist it with your diluted solution to keep it wet. Letting it dry can create new, tougher stains or damage the tile.
Once you've finished one section, move to the next. Overlap the edges of your sections slightly to avoid lines and get a consistent clean.
This acid-washing process is aggressive and not for every surface. If you are dealing with other materials, our guide on how to clean natural stone floors has more specific advice. Remember that acid is a no-go for most natural stones.
How to Neutralize and Rinse for a Perfect Finish
Just because the stains are gone doesn't mean you're done. Stopping the acid's chemical reaction is just as important as the cleaning itself. If you skip this, leftover acid can slowly damage your grout and tile over time.
Think of it this way: you used a powerful tool, and now it's time to turn it off. This final step makes sure your surface is stable, safe, and truly finished.
Creating and Applying the Neutralizer
Good news—you don’t need another harsh chemical. A simple solution made from a common household item is all you need to stop the acid.
Here's the simple recipe for your neutralizer:
- Mix one cup of baking soda into a gallon of clean, cool water.
- Stir it until the baking soda is completely dissolved.
Pour this solution over the areas you just cleaned. You might see some light fizzing. That’s a great sign—it means the neutralization is working.
The goal here is to counteract the acidity and bring the surface pH back to neutral. This simple action prevents slow damage to your grout.
The Critical Final Rinse
Once the neutralizer has worked for a moment, it's time for the final rinse. You want to remove all traces of both the acid and the baking soda. Any residue left behind can leave a dull film.
Grab a mop and a bucket of fresh, clean water. A hose is even better if you are outside. Rinse the entire area at least twice. Change your water between rinses to avoid spreading residue.
For the best results, use a wet-vac to pull all the water from the surface. This pro move removes any dissolved dirt from the grout lines and leaves the floor nearly dry.
Protecting tile is important, especially in modern homes. The ceramic tile industry, a massive market for acid cleaning tiles products, was valued at over USD 213 billion globally in 2024. You can see how fast the booming ceramic tiles market is growing on PrecedenceResearch.com. A proper finish protects that investment. While this method works for durable tile, remember that delicate surfaces need a gentler touch. Check out our guide on how to clean natural stone for more advice.
Frequently Asked Questions
Even with a guide, acid washing tile can feel like a big project. A few questions always come up. Here are the most common questions our experts at Carmel Stone Imports hear from homeowners in Palo Alto and the surrounding Bay Area.
What types of tile should I never use acid on?
This is the most important question. You must never use acid on natural stones like marble, limestone, or travertine. These are calcite-based stones, and acid will physically eat away at the surface, leaving dull spots and permanent damage. Be careful with colored concrete tiles or any tile with a metallic glaze, as acid can strip the color.
How do I know if my tiles need acid cleaning?
Acid cleaning is a powerful solution for serious problems, not for routine cleaning. You should only use it after gentler methods have failed. It's the right tool for stubborn, chalky white film (efflorescence), tough grout haze after a new installation, or deep-set rust and mineral stains from hard water.
What does it mean when the acid starts fizzing?
Fizzing and bubbling are good signs! This means the acid is working. It's a chemical reaction where the acid is dissolving alkaline materials on the tile's surface, like mineral salts or cement from grout haze. Once the fizzing stops, the reaction is mostly complete.
How do I dispose of leftover acid solution safely?
Proper disposal is critical. Never pour leftover acid solution directly down a drain or in your garden. First, you must neutralize it by slowly adding baking soda to the bucket until it stops fizzing. Once neutralized, dilute the solution with a lot of water and check your local city or county rules for disposing of household hazardous waste.
Do I need to reseal my grout after acid washing?
Yes, absolutely. This is a step you cannot skip. The acid will strip away any sealer on your grout, leaving it porous and vulnerable to new stains and moisture. After the floor is completely dry (wait at least 24 to 48 hours), apply a high-quality grout sealer to protect your grout lines and keep your floor looking great.