Getting a large-format tile installation right comes down to one thing: obsessive preparation. This guide covers the essential steps, from substrate prep to final grouting, ensuring your project in Monterey, Palo Alto, or anywhere in the Bay Area results in a flawless, durable surface. Unlike smaller tiles, large format options expose every imperfection, making meticulous planning the key to success.
The real work begins long before the first piece of tile even comes out of the box. Any dip, hump, or wave in the floor gets magnified, leading to "lippage"—annoying, uneven edges that signal potential long-term failure. This prep work is absolutely crucial here in California, where we encounter everything from new concrete slabs in modern Bay Area homes to older wood subfloors in coastal properties.
Preparing for a Flawless Tile Installation
You have to think of large-format tile installation less like tiling and more like building a precision foundation. The real work begins long before the first piece of tile even comes out of the box.
Any dip, hump, or wave in the floor—no matter how tiny it seems—gets magnified by the sheer size of the tile. This is what causes "lippage," that annoying and unprofessional-looking edge where one tile sits higher than its neighbor. It's not just ugly; it's a sign of potential long-term failure.
This prep work is absolutely crucial here in California. We see everything from brand-new concrete slabs in Palo Alto to older homes with traditional wood subfloors in places like Monterey. Each type of surface has its own set of challenges you've got to solve before you even think about mixing mortar.
Assess the Foundation
First things first: you need to get intimate with your subfloor. Grab a long, high-quality straightedge or a laser level and check your concrete slab for flatness. The industry standard for LFT is incredibly strict, demanding a surface with no more than a 1/8-inch deviation over a 10-foot span. That’s not a lot of wiggle room.
If you're working with a wood subfloor, your job is twofold. You need to check for flatness, of course, but you also have to ensure it's rock-solid and rigid. Wood flexes. It moves with humidity changes and under weight, and that movement is the number one enemy of tile and grout. You’ll almost certainly need to reinforce the subfloor to eliminate any bounce or deflection.
Key Takeaway: A perfectly flat and stable substrate is the single most critical factor for a successful large-format tile installation. Trying to cut corners here is the most common reason projects fail, and it always leads to expensive, heartbreaking repairs.
The Right Tools for the Job
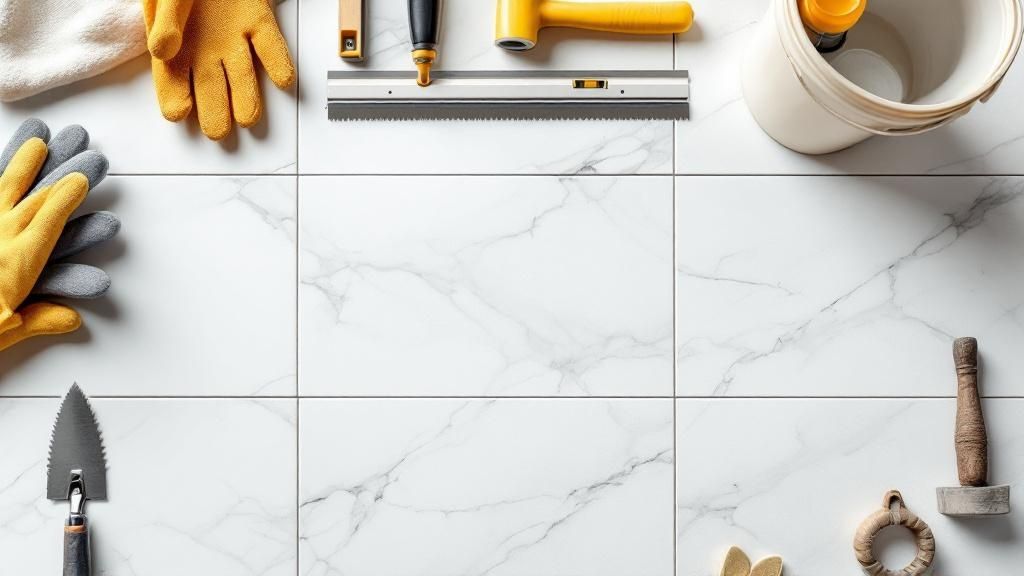
Your standard tiling tools just won't cut it. The size, weight, and inflexibility of large-format tiles demand specialized equipment. This isn't just a friendly suggestion—upgrading your toolkit is an absolute must if you want a professional-grade finish.
Before you start, it’s critical to understand the difference between a standard tiling kit and what you’ll actually need for large format tiles.
Essential Tools for Large Format Tile Installation
| Tool Category | Standard Tool | Required LFT Upgrade | Reason for Upgrade |
|---|---|---|---|
| Handling | Hands | Heavy-Duty Suction Cups | Safely lift and move massive, heavy tiles without risking breakage or injury. |
| Leveling | Eyeballing / Spirit Level | Tile Leveling System (Clips/Wedges) | Non-negotiable for eliminating lippage by locking tiles into a single flat plane while the mortar cures. |
| Mortar Application | 1/4" Notched Trowel | Large-Notched Trowel (1/2" or 3/4") | A deeper mortar bed is required for full coverage and support under a large tile. |
| Adhesion | Single-Sided Application | Back-Buttering Trowel | Used to "back-butter"—apply a thin skim coat of mortar to the tile itself to guarantee 100% adhesion. |
Simply put, trying to manhandle a 48-inch tile with your bare hands or hoping to eyeball your way to a flat floor is a recipe for disaster. Investing in the right tools is investing in the success of your project.
It’s no surprise that homeowners and designers across the Bay Area are falling in love with these huge, seamless surfaces. As these materials become more popular, knowing how to prepare for them is more important than ever. To get a better sense of this trend, you can learn more by reading about the rising popularity of porcelain tile in San Jose and surrounding areas. Getting the prep right ensures your investment pays off with a beautiful, durable surface that elevates the style and value of your home.
Achieving a Perfect Substrate and Layout
The real artistry behind a great large-format tile job is decided long before you ever mix your first bag of thin-set. A stunning, monolithic floor is built on two key pillars: a perfectly flat substrate and a smart, strategic layout. Get these right, and the rest of the project is a breeze. Get them wrong, and you'll be fighting a losing battle against lippage, cracked tiles, and a layout that just looks off.
Unlike their smaller cousins, large tiles don't hide imperfections in the subfloor. They are completely unforgiving. Because of their rigidity, they simply won't bend or flex to accommodate dips and humps. This is precisely why the industry standard is so strict, allowing for a maximum deviation of only 1/8 inch over any 10-foot span.
Forging a Flawless Foundation
Your first job is to create that perfectly flat plane. If you're working with a concrete slab, which is common in many modern Bay Area homes, this usually involves dealing with low spots. Your best friend here is a high-quality self-leveling compound. This is a pourable, cement-based product that flows into any depressions and cures to a completely flat, smooth, and strong surface—the ideal canvas for your tile.
Plywood subfloors, often found in coastal California homes, present a different kind of challenge. Wood is an active material; it moves, expands, and contracts with shifts in temperature and humidity. Even the slightest movement can transfer stress directly to the tile, causing ugly cracks in the tile and grout.
This is where an uncoupling membrane becomes absolutely critical. Products like the well-known Schluter-DITRA are installed as a layer between the plywood subfloor and the tile. The membrane acts as a buffer, absorbing the subfloor's lateral movement and "uncoupling" it from the tile above. Think of it as essential insurance for your project, protecting your investment from stress-related damage.
Uncoupling membranes are your project's silent guardian. They provide a stable, waterproof layer that isolates the tile from subfloor movement—a non-negotiable step for preventing cracks in regions with shifting soils or humidity, like the Monterey Peninsula.
Porcelain tiles are a fantastic choice for large-format projects and pair perfectly with this level of prep work. Their popularity is well-earned; in 2023, porcelain commanded a leading market share of about 53.2% in the ceramic tile market. The material is incredibly dense and non-porous, making it highly resistant to moisture, mold, and bacteria—perfect for high-traffic zones or wet areas in homes and businesses alike.
The Shift from Centerline to Grid Layout
Once your substrate is perfectly flat and stable, your focus can shift to the layout. The old-school method of just snapping a centerline and starting your work from the middle of the room simply doesn't cut it for large-format tile. To avoid awkward slivers and create a balanced look, you need a more sophisticated approach.
The goal is to design a layout that feels intentional and actually enhances the room's architecture. This process always starts with dry-fitting. Lay out a few rows of tiles, complete with the proper grout spacers, to see exactly how the pattern will fall against walls, doorways, and other fixed features. This hands-on preview is the single best way to spot potential problems before they become permanent.
This dry-fitting process lets you adjust the entire grid before you've mixed a drop of mortar. You might discover that shifting the whole layout a few inches to one side will give you much more substantial cuts on opposite walls—ideally, nothing less than half a tile wide. This simple adjustment makes a world of difference, resulting in a far more professional and visually pleasing finish. To make sure your material choice works with your layout, check out our guide on how to purchase the right natural stone tile for your home project.
This meticulous planning achieves two crucial things:
- Visual Harmony: It guarantees the tile pattern flows logically through the room, making the space feel larger and more cohesive.
- Waste Reduction: By planning your cuts ahead of time, you can significantly minimize waste and get the most out of your beautiful new material.
Taking the time for this detailed preparation is what separates an average job from a truly stunning one. It ensures your large format tile installation delivers the expansive, luxurious floor you’ve been dreaming of.
Setting Tile With Professional Precision
With a perfectly flat substrate and your layout chalked out, it’s time to get your hands dirty. This is where careful execution turns a stack of heavy tiles into a stunning, seamless surface. Every move from here on out, from mixing your mortar to that final wiggle of the tile, counts.
The first order of business is getting the mortar right. For these big, heavy tiles, you absolutely must use a mortar specifically labeled for large and heavy tile (LHT). These are engineered with extra polymers for a much stronger grip and non-sag performance, which is a lifesaver on wall installations. Mix it up following the bag's directions until you have a smooth, creamy consistency—think thick peanut butter that holds its shape on your trowel.
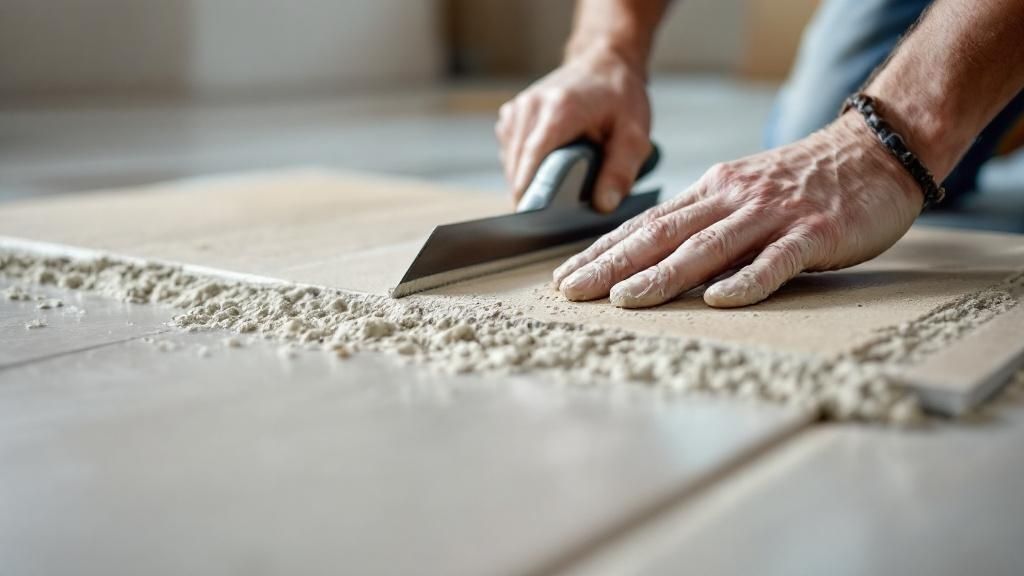
Achieving Maximum Mortar Coverage
Poor mortar coverage is a primary cause of tile failure. The industry standard isn't a suggestion; it’s a requirement: 95-100% mortar coverage for large-format tile. Getting there isn’t magic, it’s just good technique.
First, you need to "key in" the mortar. Using the flat side of your trowel, skim a thin, tight coat of mortar onto the substrate. This simple move pushes the mortar into all the microscopic pores of the backerboard or slab, creating an incredible mechanical bond that the rest of the mortar can grab onto.
Next, scoop more mortar onto the surface and, using the notched side of a proper large-format trowel (usually 1/2" x 1/2" or bigger), comb it out in one straight line. This creates clean, parallel ridges, allowing air to escape when you set the tile.
Pro Tip: Whatever you do, don't swirl the mortar into pretty patterns. It might look nice for a second, but it traps air, creating voids under the tile. Straight lines are non-negotiable for a professional job.
The Critical Art of Back-Buttering
Even with a perfectly combed bed of mortar on the floor, you're not done. The single most important step to guarantee full contact is back-buttering. This is not optional.
It's exactly what it sounds like. Before setting the tile, take your trowel and apply a thin, flat layer of mortar over the entire back of the tile, from edge to edge. This fills in any manufacturing imperfections on the tile itself and ensures that when you place it, you get a solid mortar-to-mortar bond.

As you can see, having those chalk lines as a guide is essential. It’s the roadmap that makes sure every back-buttered tile lands exactly where it’s supposed to, creating that perfect, intentional pattern.
Placing and Leveling With Modern Tools
Okay, both surfaces are buttered, and it's go time. Heavy-duty suction cups give you the control to lift the tile and set it straight down into the mortar without smearing those perfect ridges you just combed.
Once it's down, apply firm, even pressure. Give the tile a slight back-and-forth wiggle, always moving perpendicular to your trowel lines. You'll feel the ridges collapse underneath as the tile settles into place. If you want to understand why this attention to detail is so vital, you can learn more about the many benefits of tile floors and how a proper installation protects that investment.
Finally, to get that perfectly flat, lippage-free finish that screams "professional," a tile leveling system is an absolute must. These simple clip-and-wedge (or spindle) systems are game-changers. They do two critical things:
- Consistent Spacing: The clips double as your grout joint spacers, locking in uniform lines.
- Lippage Elimination: As you tighten the wedge, it pulls the edges of adjacent tiles flush with one another, holding them perfectly level while the mortar cures.
This system takes the guesswork out of eliminating lippage, which is incredibly difficult to do by eye with tiles this large. The result is a floor that's smooth enough to walk on barefoot without catching a single edge. After the mortar has cured, you just snap the clips off, and you're ready for grout.
The Art of Cutting and Shaping Large Tiles
Making clean, accurate cuts on oversized materials is where true craftsmanship really shines. Your standard score-and-snap cutter just won’t deliver the precision you need for a 48-inch porcelain slab. Mastering the cutting process is a non-negotiable part of a professional large format tile installation.
The right tool for the job really comes down to the material in your hands and the type of cut you need to make. For simple, straight cuts on porcelain, you might get away with a high-quality manual "rail" cutter. But for anything more complex, a powerful wet saw with a sliding table is absolutely indispensable.
Tooling Up for Precision Cuts
A wet saw isn't just a power tool; it's a precision instrument. The continuous stream of water flowing over the diamond blade keeps it from overheating and tamps down dust—a massive health and cleanup benefit.
For these huge tiles, you need a saw with a beefy sliding table and a motor that won't quit. The table must fully support the tile through the entire cut, which is key to preventing stress fractures or chipping.
Expert Insight: The single biggest mistake is using the wrong blade. A cheap, generic diamond blade will chip dense porcelain no matter how good your saw is. Always invest in a high-quality blade specifically designed for the material you are cutting—it makes all the difference.
Techniques for Flawless Shaping
Making complex cuts without chipping or breaking the tile is all about technique, patience, and proper support. Whether you're cutting out a rectangle for a floor vent or a circle for a plumbing pipe, the principles don't change.
- L-Shaped Cuts: To fit tiles around corners and door jambs, make two separate straight cuts that meet precisely at the corner, starting from the outside edges. This approach relieves stress and prevents the corner from cracking.
- Hole Sawing: When cutting for plumbing fixtures, use a diamond-tipped hole saw on a variable-speed drill. Start the hole at a slight angle to get a "bite," then slowly bring the tool to a 90-degree angle. A constant, slow speed with light pressure and plenty of water is the secret to a clean cutout.
- Cutting Speed: Don't ever force the tile through the blade. Let the saw do the work. A slow, steady feed rate keeps the blade from bogging down and dramatically reduces chipping.
Imagine tiling a fireplace hearth in a beautiful Monterey home, which will involve a series of precise cuts. A scenario like this is where having both the right tools and solid techniques pays off, turning a huge challenge into a stunning architectural feature. For more ideas, check out our guide on how to combine tile choices for a stylish space.
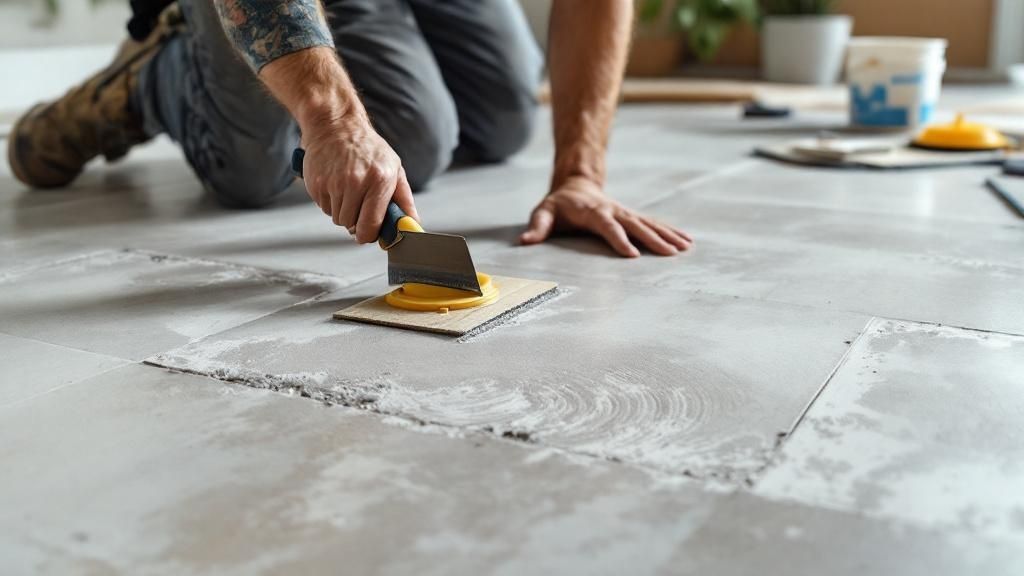
Grouting and Finishing for a Lasting Impression
The final steps—grouting and finishing—are where your project truly comes together. This isn't just cleanup; it's the critical detail work that transforms individual tiles into a seamless, monolithic surface. A sloppy grout job can ruin an otherwise perfect installation.
This stage is all about creating clean, consistent grout lines that let your beautiful tile choice shine. The goal is to make the grout almost invisible, allowing the beauty of the stone or porcelain to take center stage. Choosing the right grout and color is essential.
Choosing the Right Grout for Your Project
You'll mainly run into two types of grout: cementitious and epoxy. Each has its place.
For most residential jobs in dry areas like a living room in a Palo Alto home, a high-performance, polymer-modified cementitious grout is a fantastic choice. It offers better flexibility, stain resistance, and color consistency than older formulas.
But for areas that take a real beating, epoxy is the undisputed champion.
- Epoxy Grout: The go-to for high-traffic commercial spaces, kitchens, and especially wet areas like showers. It’s virtually non-porous, making it waterproof and incredibly resistant to stains, chemicals, and cracking.
- Cementitious Grout: Easier to handle, and modern formulas perform beautifully. Use sanded grout for joints wider than 1/8 inch and unsanded for anything narrower.
Expert Insight: We always recommend a grout color that closely matches the tile. High-contrast grout lines chop up the surface and defeat the purpose of using large tiles to create an open, expansive feel. The less you notice the grout, the better.
The Art of Application and Cleaning
Grouting is a race against the clock. Hold your grout float at a 45-degree angle to the tile and press the grout firmly into the joints, swiping diagonally across them. This packs the joints tight without pulling the grout back out.
Once the joints are filled, wait for the grout to set up slightly—it should be firm, not sticky. Then, take a damp (not soaking wet!) grout sponge and make light, diagonal passes over the tile to wipe away the excess. Use a two-bucket system (one for rinsing, one with clean water) to prevent spreading a hazy film.
This meticulous finishing is especially crucial for statement pieces, like a stunning fireplace surround. To see how these same principles apply on a vertical surface, check out our guide on achieving luxury at home with tile fireplaces.
Protecting Your Investment with Expansion Joints
Lastly, a professional installation must account for movement. In California, with its temperature swings, materials expand and contract. To prevent stress buildup, you must include soft expansion joints filled with a flexible, color-matched 100% silicone sealant, not rigid grout.
Place them along all perimeter walls, where tile meets a different flooring type, and across large floors every 20-25 feet. This is a non-negotiable step that protects the long-term integrity of your floor.
Frequently Asked Questions
What is the biggest challenge with large format tile?
The single biggest challenge is achieving a perfectly flat subfloor. Large tiles are rigid and unforgiving, magnifying any dips or humps, which leads to uneven edges ("lippage") and potential stress cracks. Proper substrate preparation is the absolute foundation for a successful, long-lasting installation.
Do large format tiles make a room look bigger?
Yes, they have a dramatic impact. With far fewer grout lines interrupting the visual flow, the floor appears as a more continuous, uninterrupted surface. This visual trick makes any space, from a small bathroom to an open-concept living area in a Bay Area home, feel more serene and expansive.
Can large format tiles be installed on walls?
Absolutely. They create a clean, seamless look that feels incredibly modern, especially in showers or as a feature wall. The wall must be plumb, flat, and strong enough for the weight, and you must use a specialized large and heavy tile (LHT) mortar with non-sag properties to prevent tiles from sliding before the mortar cures.
What size grout line is best for large format tile?
While a "no-grout" look is not structurally possible, you can get very close. We recommend a minimum grout line of 1/8 inch for most installations. With perfectly rectified tiles and a flawless substrate, an expert installer might achieve a 1/16 inch joint, which requires a tile leveling system to ensure uniformity.
Is professional installation recommended for large format tile?
Yes, professional installation is highly recommended. The specific challenges—achieving a perfectly flat substrate, handling heavy and awkward materials, and using specialized tools and mortars—are best managed by an experienced installer. Carmel Stone Imports works with a network of trusted trade professionals to ensure our clients' projects meet the highest standards of quality and durability.
Ready to transform your space with the expansive beauty of large format tile? The experts at Carmel Stone Imports can guide you through our unparalleled collection of natural stone and premium porcelain. Visit our showrooms or contact us today to start planning your project.
