Installing stone veneer is a craft that blends meticulous prep work with an artistic eye for placing each stone. This guide is your roadmap for learning how to install stone veneer, covering everything from surface preparation to the final artistic touches. Following these steps ensures a timeless, solid-stone look that can completely transform a space, whether it's a fireplace in Palo Alto or a stunning exterior in Monterey.
Why Stone Veneer Is Popping Up All Over California Homes
Stone veneer delivers the classic, rugged beauty of full-dimension stone without the back-breaking weight or need for heavy-duty structural support. This makes it a perfect fit for California's eclectic mix of architectural styles, from sleek, modern homes in the Bay Area to cozy, rustic retreats down in Monterey. Its versatility is truly second to none.
This guide will go beyond a simple "Step 1, Step 2" list to get into the why behind each technique. Understanding the process is key, whether you're giving a fireplace a much-needed facelift or boosting your home's curb appeal. For homeowners looking to level up a property, sorting out house renovation financing can be a crucial first move.
The Appeal of Stone Veneer Keeps Growing
The buzz around this material reflects a huge trend in design and construction. The global market hit USD 731.5 million in 2024 and is expected to rocket past USD 1 billion by 2035, according to industry analysis. This boom is fueled by its role as a smart, efficient alternative to full-bed stone, offering a high-end, authentic look for a fraction of the cost and structural hassle.
Its adaptability means it works for all kinds of projects, with options like ultra-thin-cut natural stone. For a great example of how different stones create unique looks, check out our guide on Jerusalem thin veneer.
The real magic of stone veneer is its ability to deliver the authentic, high-end look of natural stone with significantly less complexity and cost. It’s what makes luxurious design more accessible to everyone.
To give you a clearer picture of the journey ahead, let's break down the major phases of the installation process.
Stone Veneer Installation at a Glance
This table offers a quick snapshot of the key stages you'll navigate during your project. Think of it as your high-level game plan for a successful stone veneer installation.
| Phase | Key Objective | Critical Materials |
|---|---|---|
| Preparation | Create a solid, waterproof, and stable substrate for the veneer. | Weather-Resistive Barrier (WRB), Metal Lath, Scratch Coat Mortar |
| Stone Layout | Plan the artistic arrangement of stones to ensure a natural look. | Stones, Chalk Line, Angle Grinder |
| Installation | Adhere the stones securely to the prepared surface. | Mortar, Trowel, Grout Bag |
| Finishing | Fill the joints and clean the stone for a polished, professional finish. | Grout/Mortar, Jointing Tool, Sponge, Brush |
Each phase is critical. Skipping or rushing one can compromise the entire project, so taking your time here pays off big time in the final result. This guide is designed to arm you with the confidence and know-how to tackle your installation like a pro.
Gathering Your Tools and Materials for Success
A professional-grade stone veneer installation starts long before the first stone touches the wall. Getting your prep work right, with every tool and material ready to go, is the foundation for a smooth project. Rushing this stage is a surefire recipe for frustrating mid-project delays and compromises.

Think of it like a chef prepping ingredients before service. When everything is organized and within arm's reach, you can focus entirely on the craft of setting the stone.
The Essential Tool Checklist
Pulling together the right equipment is non-negotiable. Masonry work demands specific gear designed to handle the unique demands of stone and mortar.
- Angle Grinder with Diamond Blade: This is your go-to for cutting and shaping stones. A diamond blade is a must for clean, precise cuts without chipping.
- Notched Trowel: Used to apply the initial scratch coat, its notches create grooves for a powerful mechanical bond to the wall.
- Pointing Trowel: This smaller trowel is your workhorse for "buttering" the back of each stone and tucking mortar into joints.
- Masonry Hammer: Its sharp, chisel-like end is perfect for chipping small bits of stone for a perfect fit.
- Grout Bag: Similar to a baker’s piping bag, this tool applies grout or mortar deep into joints without smearing stone faces.
- Mixing Tools: A heavy-duty drill with a paddle mixer attachment ensures a consistent, lump-free mortar mix. You’ll also need sturdy buckets.
- Level and Chalk Line: These are vital for snapping straight, level guidelines to prevent your stone rows from drifting.
Choosing Your Core Materials
The materials you select define not just the look of your project but also its long-term durability. This includes the foundational layers that protect your home from the elements.
A successful installation is built in layers. The stone you see is only as good as the weather-resistant barrier, metal lath, and scratch coat hidden behind it.
Especially for projects in California's coastal communities like Monterey, proper moisture management is everything. A top-notch weather-resistant barrier (WRB) is your first line of defense, followed by a metal lath to create a grippy surface for mortar.
Of course, the star of the show is the veneer. Whether you choose the unique character of natural stone or a high-quality manufactured option, ensure it complements your home’s style. For a cohesive design from vertical walls to horizontal walkways, explore our detailed comparison of natural stone pavers and porcelain pavers.
Finally, selecting the right mortar mix is crucial. A Type S or Type N mortar provides the high bond strength needed to hold the weight of the stone against the wall.
Building a Bulletproof Foundation for Your Veneer
The long-term success of your stone veneer project truly comes down to the quality of your prep work. This isn't just a preliminary step; it's the structural backbone of the entire installation. Rushing this stage is the most common mistake and can lead to serious headaches down the line.
A solid foundation does more than just hold up the stone. It's also your primary defense against moisture, which is a significant concern in coastal California climates from Monterey to the Bay Area.
Securing the Weather-Resistive Barrier
Think of the weather-resistant barrier (WRB) as a raincoat for your house. This layer, typically asphalt-saturated building paper or house wrap, stops any water that gets behind the veneer. Any moisture is directed safely away before it can cause rot or mold.
Precision is key during installation. Work from the bottom up, overlapping layers like shingles. Each horizontal layer should overlap the one below it by at least two inches, and vertical seams by six inches.
Installing Metal Lath Correctly
Once the WRB is secure, it's time to add the metal lath. This metal mesh grid gives the mortar something to bite into. Without it, the mortar would have a weak bond and could easily fail.
Pay close attention to orientation. The small, cup-like formations in the mesh must point up and away from the wall—the "cups up" position. This acts like thousands of tiny shovels, holding wet mortar in place. Secure the lath to wall studs every six inches vertically with galvanized fasteners that penetrate at least one inch into the studs.
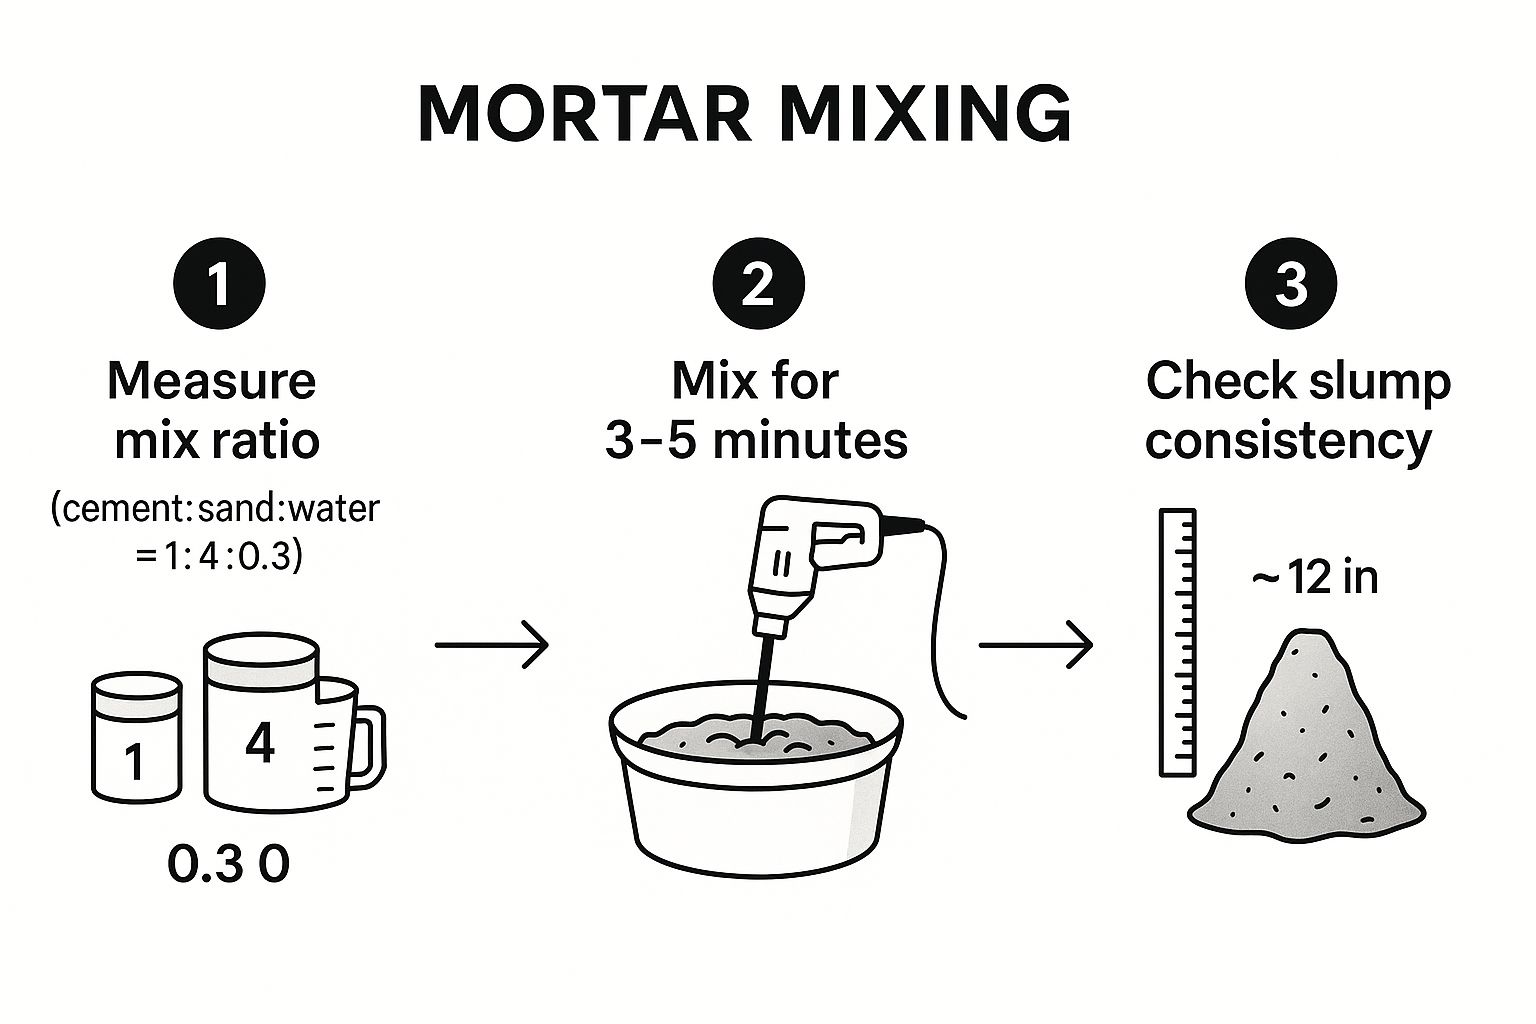
Mixing and Applying the Scratch Coat
The scratch coat is a ½-inch-thick layer of mortar applied over the lath, serving as the final substrate for your stone. Getting the mortar consistency right is key; it should be wet enough to spread but stiff enough not to slump off the wall.
Learning how to install stone veneer has grown in popularity as the market expands. This multi-step process, especially the careful prep work, is a big reason both pros and DIYers are embracing it.
After mixing your mortar, press it firmly through the lath's mesh with a trowel, embedding it fully. You shouldn't see any metal lath when you're done.
The "scratch" in scratch coat is the most important part. Once the mortar is on the wall but still wet, grab a plasterer's rake or a notched trowel and score horizontal grooves across the surface. These grooves create a rough, textured profile that gives the setting mortar for the stone a powerful mechanical key to lock into. It’s a game-changer for a permanent bond.
After scratching, let the surface cure for at least 48 hours. It must be hard to the touch before setting the first stone. For tips on choosing materials that work well together, our guide on how to purchase natural stone tile for home installation can help.
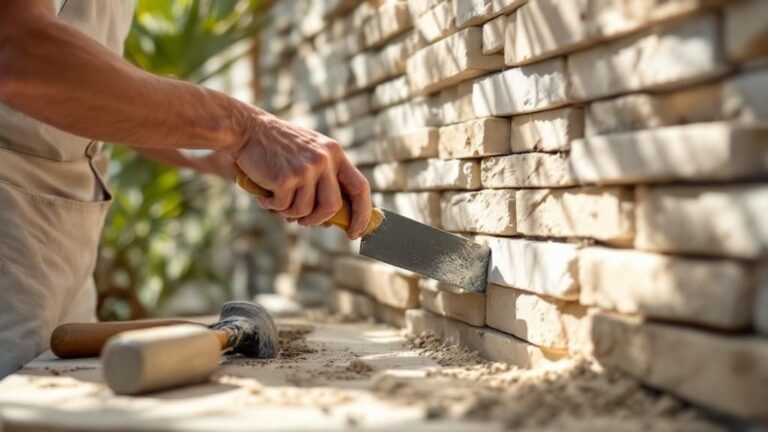
Setting the Stone with an Artisan's Touch
This is where the real fun begins. All that prep work is about to pay off as you transform a blank wall into a work of art. A thoughtful, patient approach here is what separates a decent job from one that looks truly professional.
Before you mix your mortar, you absolutely must do a dry layout. This means laying out a good chunk of your stones on a tarp near your project area.
The Critical Importance of a Dry Layout
Think of the dry layout as your rehearsal. It's your chance to play artist and map everything out visually, avoiding amateur mistakes like color clumping or awkward repeating patterns.
As you lay the stones out, keep these things in mind:
- Blend Your Colors: Never work from just one box of stone. Pull from several boxes at once to get a truly random and organic blend of tones.
- Vary Sizes and Shapes: Mix large, medium, and small stones. Stagger different shapes so you don't accidentally create unnatural lines.
- Plan Your Corners: If your project has corners, lay out the special L-shaped corner pieces first. They are key to selling the illusion of a full-depth stone wall.
Once you have an arrangement you love, you're ready to mix your mortar and get these stones on the wall.
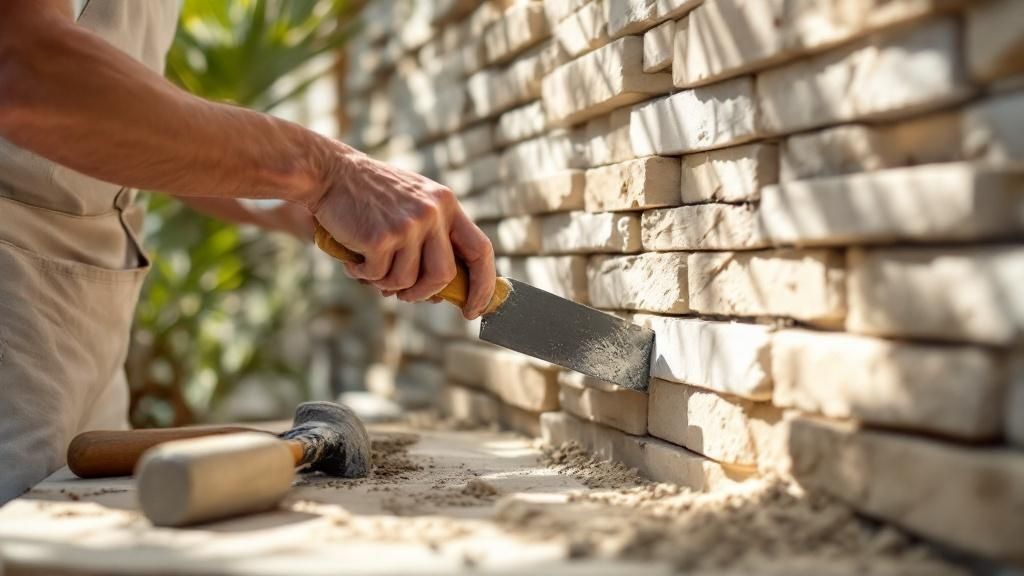
Applying Mortar and Setting the Stones
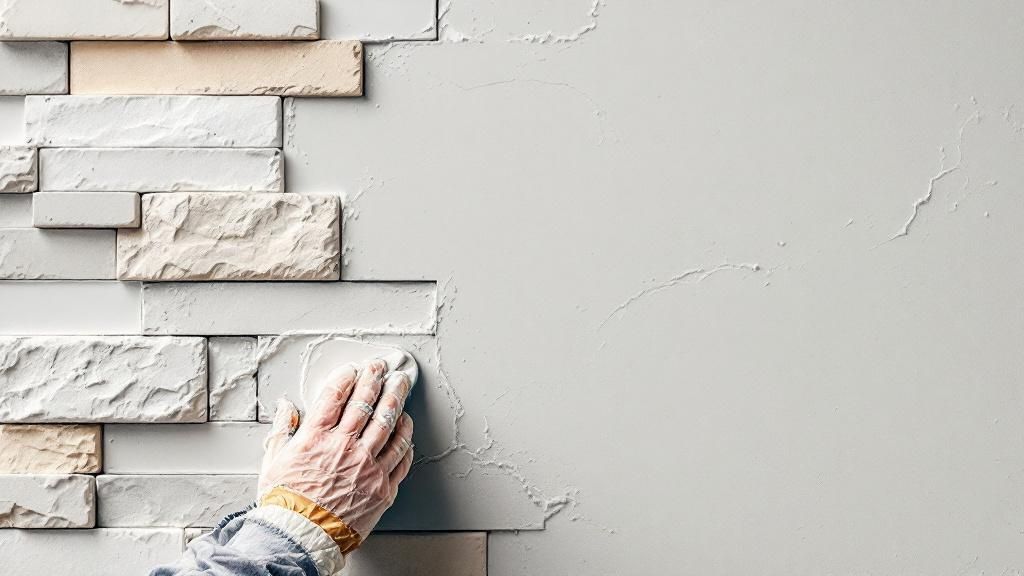
Applying mortar is straightforward, but consistency is key. You'll apply an even layer of mortar to the back of every stone, a process called "buttering". This ensures the entire stone gets a solid grip on the scratch coat.
Aim for a layer about ½ to ¾ inch thick covering the whole back of the stone. Press the stone firmly into the wall with a slight side-to-side wiggle. This motion squishes out air pockets and embeds the stone for maximum adhesion.
Pro Tip: Always start setting stones at the corners and work your way in. When you set the corner pieces first, you build a strong, visually authentic frame that makes placing the rest of the stones so much easier. It’s a trade secret for a flawless look.
As you place each stone, keep the joint between them consistent. A ½ inch gap is a standard look, but feel free to adjust it to your taste.
Cutting and Fitting for Obstacles
No wall is a perfect rectangle. You will need to cut stones to fit around windows, outlets, and doorways. This is where your angle grinder with a diamond blade becomes your best friend.
To get a clean cut:
- Hold the stone up where it needs to go and mark your cut line.
- With safety gear on, make several shallow passes with the grinder.
- Slowly go deeper with each pass until you're clean through.
Honing your cutting skills is a huge part of learning how to install stone veneer like a pro. This is similar to how material workability is a key consideration when comparing ceramic vs. porcelain tile.
Every so often, step back 10-15 feet from the wall. This gives you the perspective to check the overall balance and spot any weird patterns forming.
Applying The Finishing Touches For Lasting Beauty
You’re in the home stretch, but the final steps—grouting, pointing, and sealing—are what truly bring your stone veneer wall to life. This is where the project moves from construction to craftsmanship, protecting your work and defining its final character.
It’s tempting to rush, but patience here is what separates a DIY job from a professional-looking feature. Cutting corners now can mean sloppy joints or ugly mortar stains that undermine the stone's natural beauty.
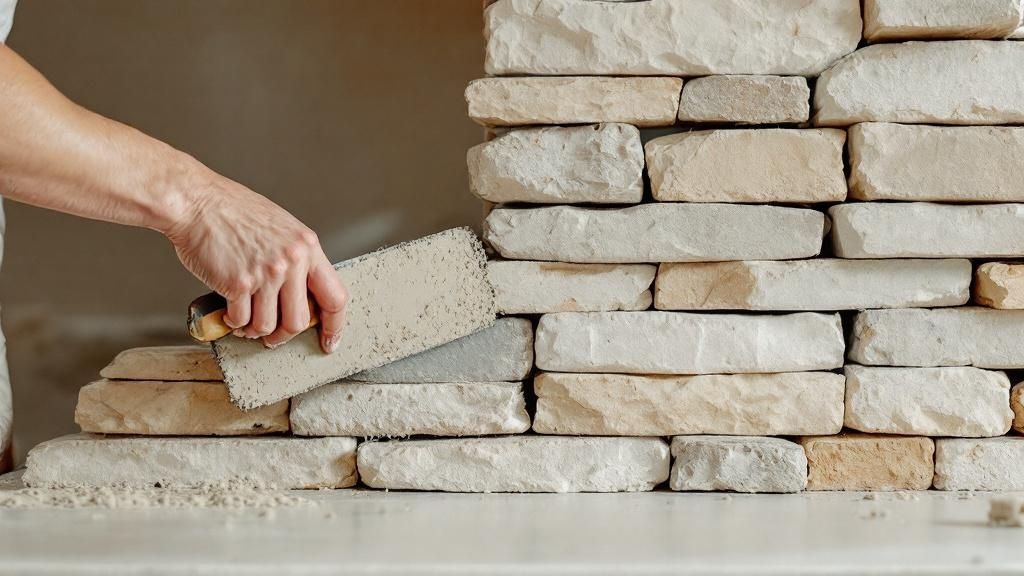
Grouting Your Stone Veneer Joints
Grouting fills the gaps between the stones, locking everything together and giving the wall a cohesive appearance. The secret to clean work is using a grout bag. This tool lets you inject mortar deep into the joints without smearing the stone faces.
Mix your mortar or grout to a consistency like creamy peanut butter—firm enough to hold its shape but wet enough to flow smoothly. Apply steady pressure and slightly overfill the joints, ensuring the mortar pushes deep into every crevice for a solid, weatherproof seal.
Creating Your Desired Look With Pointing
Once the grout is “thumbprint hard,” it's time to start pointing. This is the art of tooling the joints to create a specific finish, which dramatically impacts the wall’s final look.
- Raked Joint: This popular style scrapes out the top layer of grout to a consistent depth, creating crisp shadow lines that make each stone pop.
- Flush Joint: For a smoother, more unified look, a flush joint is struck level with the face of the stone, lending a rustic, old-world aesthetic.
- Overgrout Joint: Also called a grapevine or messy joint, this technique involves intentionally spreading mortar over the stone edges to mimic historic masonry.
After tooling the joints, use a soft, dry brush to gently whisk away any loose mortar crumbs from the stone faces before they cure.
The right pointing technique does more than just fill a gap; it shapes the light and shadow across the wall, defining the texture and mood of the entire space. It’s the signature of the artisan.
To ensure your investment is protected, keeping a visual record is a smart move. Following professional construction photo documentation tips provides a clear history of the installation for quality control.
Sealing Your Stone For Protection
Sealing the stone is the final, critical step, especially for exterior projects or areas exposed to moisture. A high-quality sealer acts as an invisible shield, protecting your hard work from the elements. This is vital for homes in California, where intense sun and salty coastal air can take a toll.
A good penetrating sealer soaks deep into the stone and grout to protect from within, without leaving a glossy, artificial film. It’s your best defense against:
- Water Absorption: This reduces the risk of freeze-thaw damage and helps prevent efflorescence (chalky white salt deposits).
- Staining: It repels dirt, oil, and other grime, making your wall easier to clean.
- Fading: Many sealers also offer UV protection, helping preserve the stone’s rich, natural color.
Your material choice impacts every step, from installation to long-term care. You can learn how to choose the right natural stone in our other guide. Always follow the sealer manufacturer’s instructions to guarantee a beautiful, lasting finish.
Frequently Asked Questions
Here are answers to some of the most common questions we receive from clients in the Bay Area and beyond about stone veneer projects.
Can I install stone veneer over existing brick?
Yes, you can often install veneer over unpainted brick or stucco, provided the surface is structurally sound and thoroughly cleaned. Painted or sealed surfaces, however, will require a metal lath to ensure proper adhesion for the mortar. Siding of any kind must be completely removed down to the sheathing before you begin.
What is the difference between natural and manufactured stone veneer?
Natural thin stone veneer is genuine stone quarried from the earth and cut thin, offering unparalleled authenticity and unique character in every piece. Manufactured stone is a concrete-based product cast from molds of real stone. While it's a lighter and more budget-friendly alternative, it cannot replicate the organic variation and durability of natural stone from Carmel Stone Imports.
How do I maintain my stone veneer?
Stone veneer is very low-maintenance. A periodic cleaning with a soft-bristle brush and mild, non-acidic detergent is usually all that’s needed to remove dirt. Never use a pressure washer or acid-based cleaners, as they can damage the mortar and discolor the stone.
What is the biggest mistake to avoid during installation?
The most critical mistake is improper water management. Failing to correctly install a weather-resistant barrier (WRB) and flashings, especially around windows and doors, can trap moisture behind the wall. This leads to rot, mold, and potential structural failure. Mastering water prevention is key to knowing how to install stone veneer correctly.
Do I need to leave a gap at the bottom of an exterior wall?
Yes, this is non-negotiable for exterior applications. A minimum 2-inch gap must be left between the bottom of the veneer and any softscape (like soil or grass). This "weep screed" gap allows any moisture that gets behind the wall to drain out, preventing water damage and ensuring the longevity of your installation.
Ready to find the perfect stone for your next project? The experts at Carmel Stone Imports are here to guide you through our stunning collection of natural and engineered stone veneers. Visit one of our showrooms in Palo Alto, Carmel, or Sand City, or contact us today to start your design journey.