Sealing your natural stone isn't just another chore; it's a critical investment in your home's longevity and beauty. This guide explains how to seal natural stone, protecting porous materials like marble, travertine, and limestone from everyday life. A quality seal acts as an essential shield, keeping your surfaces looking pristine and guarding them against everything from spilled wine to water spots for years.
Why Sealing Natural Stone Is Your Best Bet
Consider sealer an insurance policy for your stone. Natural stone is defined by its unique character—beautiful veins and rich textures—but that beauty comes with a porous nature. This means liquids like oil, coffee, or even water can seep into the surface, leaving stubborn stains or causing damage.
Whether you're dealing with the damp, salty air in Carmel or the variable Bay Area climate, a proper seal is your first line of defense against the elements. Properly sealing your stone heads off common problems that can detract from its elegance and value.
- Stain Resistance: The sealer creates a protective barrier, stopping liquids before they can soak in. This makes cleanup a breeze and prevents permanent discoloration.
- Moisture Protection: In humid climates, a sealer is critical. It stops moisture from getting trapped inside the stone, which can lead to efflorescence (a chalky white powder) or even cracking.
- Enhanced Durability: A good seal helps your stone stand up to daily wear and tear, protecting it from weathering and erosion.
The Financial Sense of Sealing
Beyond aesthetics, sealing is a smart financial move. Surfaces that are sealed correctly require less heavy-duty maintenance and are far less likely to need expensive professional restoration. The small upfront cost of sealing pales in comparison to the bill for fixing an etched marble countertop or a stained limestone floor.
This is especially true for standout features. Protecting a gorgeous natural stone fireplace, for instance, ensures it remains a showpiece and a valuable asset for years to come.
Here's the bottom line: Sealing your natural stone surfaces makes a huge difference in their lifespan. Studies show that a quality seal can cut down on stain penetration by over 70%, meaning you're far less likely to need costly refinishing work.
This isn't just an opinion; the numbers back it up. According to Verified Market Reports, the global natural stone sealer market was valued at USD 1.25 billion in 2023, showing just how vital this step is for property upkeep. Understanding how to protect your home from the elements is key, and you can learn more from guides on expert waterproofing solutions. Knowing how to seal natural stone is the first step in protecting your investment.
Choosing the Right Sealer for Your Specific Stone
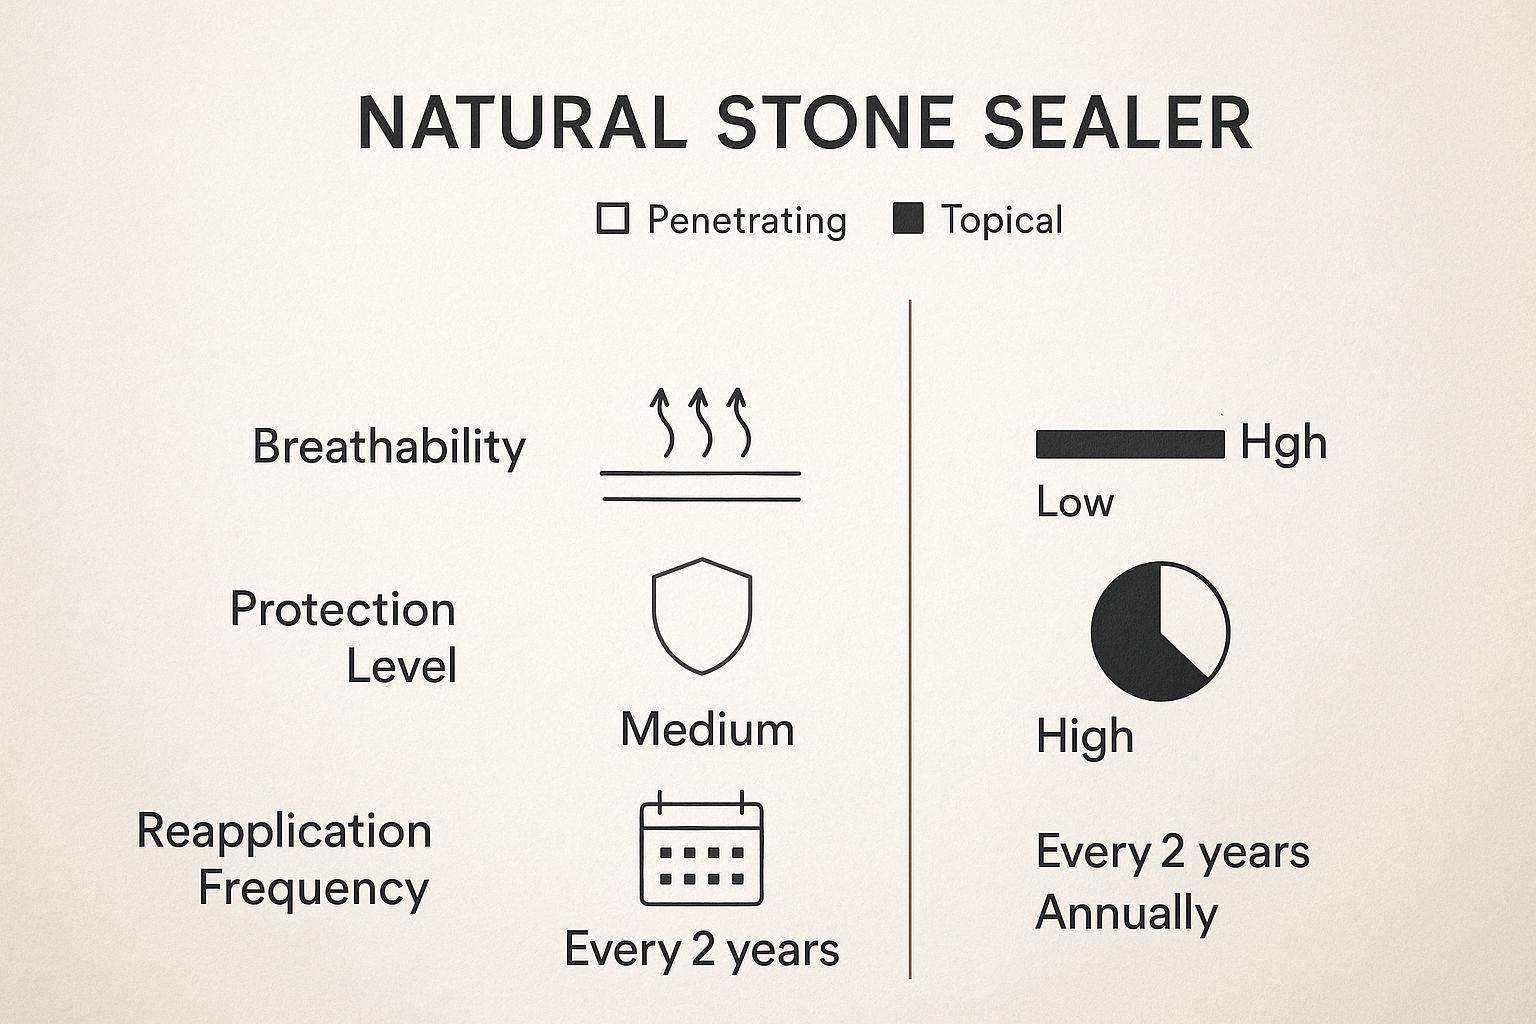
Picking the perfect sealer is one of the most critical decisions you'll make. Matching the product to your stone's specific needs is the key to long-lasting beauty and protection. Understanding how to seal natural stone correctly starts with your two main choices: penetrating sealers and topical sealers.
For the exquisite, hand-selected materials we offer at Carmel Stone Imports, a penetrating sealer—or impregnating sealer—is almost always the best choice. Instead of creating a film on top, this sealer dives deep into the stone’s pores. It works from the inside out to block water and oils while letting the stone breathe, which is crucial for maintaining that authentic, natural finish.
Penetrating vs. Topical Sealers
The sealer you choose directly affects your stone's final look, its breathability, and how often you'll need to re-seal. The two categories perform very differently. Here’s a quick comparison to help you decide.
| Feature | Penetrating (Impregnating) Sealer | Topical Sealer |
|---|---|---|
| How it Works | Absorbs into the stone's pores to protect from within. | Forms a protective film on the surface. |
| Appearance | Invisible, preserves the stone's natural look and feel. | Can add a gloss, satin, or matte sheen. |
| Breathability | High; allows moisture vapor to escape. | Low; can trap moisture, causing a cloudy look. |
| Protection | Excellent for oil and water-based stains. | Creates a surface barrier against spills and scratches. |
| Reapplication | Typically every 2-5+ years, depending on use. | Often needs reapplication annually. |
| Best For | Porous stones like limestone, marble, and travertine. | Dense stones, or for achieving a specific finish. |
While a topical sealer might seem to offer more surface protection, trapping moisture is a big risk, and frequent reapplication can become a hassle. For most applications in California homes, from Monterey to Palo Alto, a penetrating sealer is the superior solution.
Water-Based vs. Solvent-Based Formulas
Once you've settled on a penetrating sealer, you have another choice: water-based or solvent-based. For health-conscious homeowners, water-based, low-VOC (Volatile Organic Compound) sealers are a fantastic option. They have very little odor and are much friendlier to indoor air quality.
Solvent-based sealers use stronger chemicals that can penetrate very dense stones more effectively. However, they come with powerful fumes that require serious ventilation during application. The right choice depends on your stone’s porosity and where it’s installed.
Specialty Sealers for a Custom Look
Beyond just protecting your stone, some sealers are designed to achieve a specific aesthetic.
- Color-Enhancing Sealers: These penetrating formulas deepen your stone’s natural colors, giving it a vibrant, "wet" look without leaving a glossy film.
- Topical Gloss or Matte Sealers: These are surface coatings that add a noticeable sheen or a muted, honed finish. They are used for specific design goals.
Your stone's location, finish, and natural qualities all factor into this decision. For guidance on matching the perfect stone with the right care, see our guide on how to choose the right natural stone.
How to Prepare Your Stone Surface Like a Pro
Any professional will tell you that a perfect seal starts long before you open the can. The time you put into prep work guarantees a flawless, lasting finish. Getting your stone surface meticulously clean and dry isn't just a suggestion—it's non-negotiable.
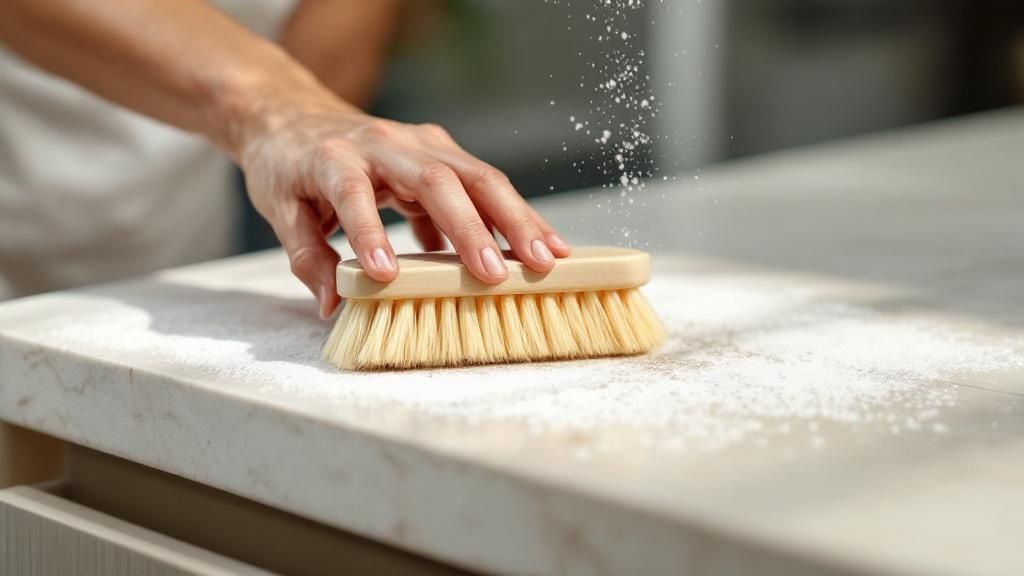
Your first job is a deep, thorough cleaning to remove every bit of dirt, oil, and grime. A common mistake is reaching for a standard household cleaner, as most are too acidic or alkaline. These can etch the stone or leave a residue that blocks the sealer from absorbing.
You need a high-quality, pH-neutral cleaner made specifically for natural stone. It’s formulated to lift away dirt without harming the delicate surface of your marble, limestone, or travertine.
Address Stains and Ensure a Dry Surface
If you have existing stains, now is the time to tackle them. Oil spots or water rings won't vanish under a coat of sealer; in fact, they’ll be trapped there forever. For stubborn oil-based stains, a poultice mixture is a great trick for drawing the oil out of the stone’s pores.
Once the stone is clean and stain-free, let it dry completely. Sealer and moisture are enemies; applying sealer to a damp stone traps water underneath, resulting in a cloudy, hazy mess and a failed seal.
Professional Tip: Be patient with drying time. After cleaning, wait a minimum of 24-48 hours before sealing. In humid coastal climates like Monterey, you might need even more time. Use fans to boost air circulation and ensure the stone is bone-dry.
The Final Touches Before Sealing
With the surface clean and dry, it's time for the final prep that separates an amateur job from a professional one. Carefully tape off any adjacent surfaces to prevent accidental drips or overspray.
- Cabinetry and Woodwork: Use painter’s tape for a crisp, clean line.
- Faucets and Fixtures: Cover chrome, brass, or stainless steel fixtures completely.
- Walls and Backsplashes: Tape off painted walls or any tile that butts up against the stone.
This careful preparation ensures the sealer only goes where you want it. If you’re starting a new project, our guide on how to purchase natural stone tile for home installation offers key insights.
A Practical Guide to Applying Natural Stone Sealer
With a perfectly prepped surface, you’re ready for the most satisfying part of the job. Applying sealer is where your meticulous work pays off, creating a tough shield to protect your beautiful stone. This is the nitty-gritty of how to seal natural stone with a technique that delivers a flawless finish.
First, grab the right tools. Your choice of applicator can make or break the final result.
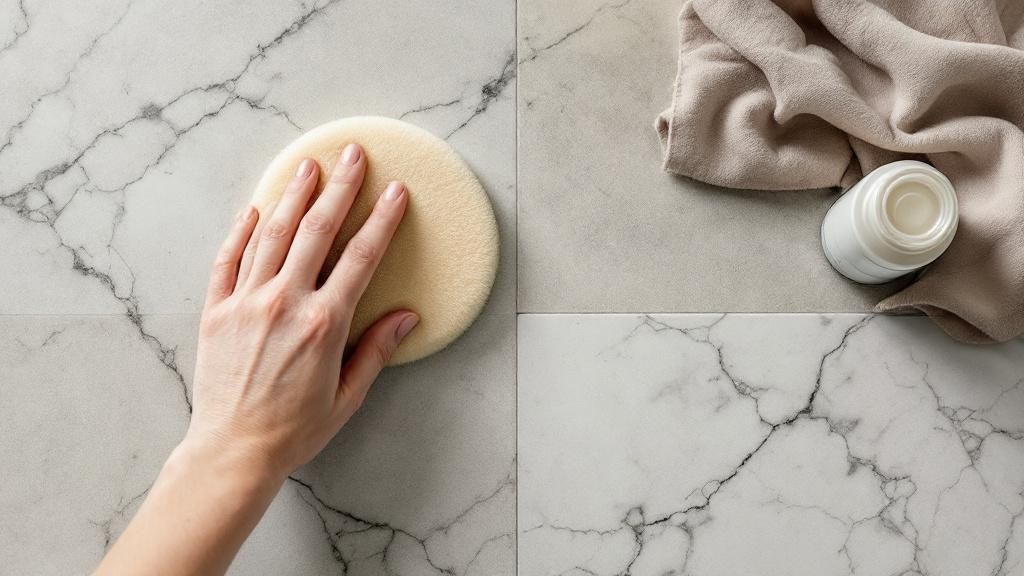
- For Countertops: A clean, lint-free microfiber cloth or a dedicated sealer applicator pad is best. This lets you work the sealer into the stone without drips or over-application.
- For Floors: A lamb's wool applicator works for large areas, but for smaller floors, getting down with a microfiber cloth often gives the most consistent coverage.
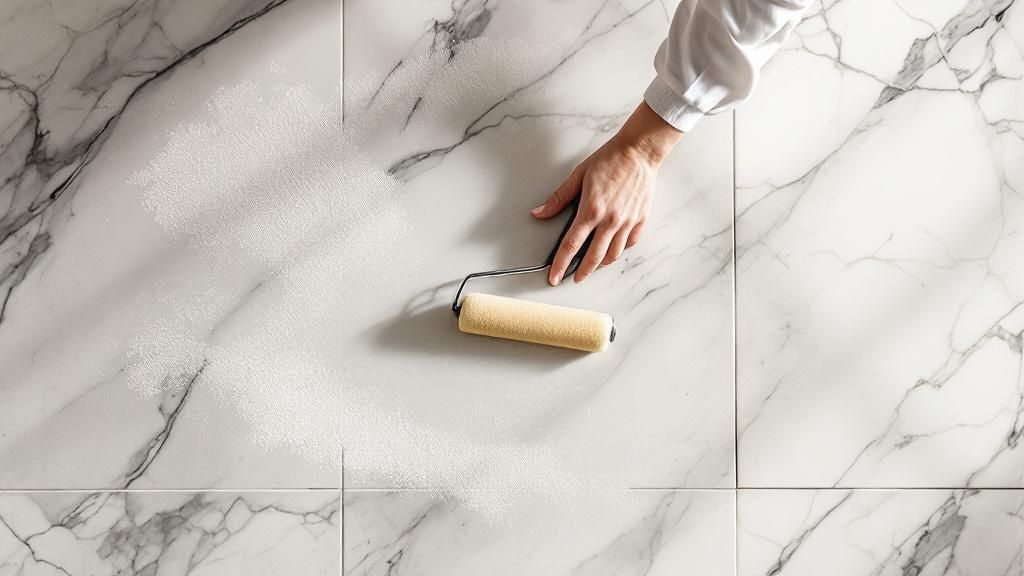
The technique is simple: apply a thin, even coat. You're not flooding the surface; think of it like applying moisturizer. Work in manageable sections of about three to four square feet at a time to maintain a "wet edge" and prevent streaks.
Reading the Stone and Applying a Second Coat
Your stone will tell you if it needs more sealer. After applying the first coat, let it sit for the time recommended by the manufacturer, usually around 5-15 minutes. During this dwell time, watch the surface closely.
If the sealer soaks in and disappears almost instantly, you have a porous stone like honed limestone or travertine. That's a clear signal a second coat is needed. Apply the second coat while the first is still damp, using the same thin-and-even technique.
The Biggest DIY Mistake: The most common error is leaving excess sealer on the surface to dry. Once the stone has absorbed all it can, any leftover sealer will cure into a hazy, sticky residue that is a nightmare to remove.
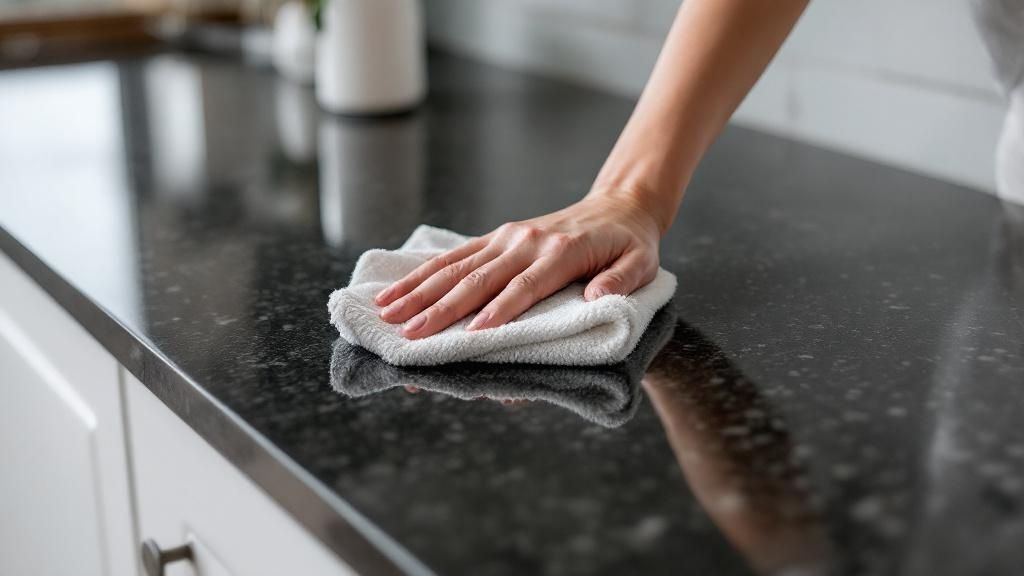
The Crucial Final Step: Wiping Away the Excess
After the dwell time is up, this final step is non-negotiable. Grab a clean, dry microfiber cloth and thoroughly wipe away every bit of excess sealer. Buff the area until it's completely dry to the touch.
Your goal is to leave the sealer in the stone, not on it. A properly sealed surface should look and feel exactly as it did before, only now it’s protected from within. For tips on daily care, check our guide on sanitizing natural and engineered stone.
Testing Your Seal and Maintaining Its Protection
You've done the hard work, but the next phase—curing and ongoing care—determines whether your stone stays beautiful for the long haul. While your surface may feel dry in a few hours, a full cure is different. The sealer reaches its maximum hardness and protective qualities in 24 to 72 hours.
During this crucial window, be gentle. Avoid spills, heavy traffic, and sliding objects across the surface.
The Ultimate Proof: A Simple Water Test
How can you be sure the seal worked? Use the water test. Sprinkle a few drops of water onto different spots on the stone.
If the water beads up into tight droplets, you've nailed it. Your sealer has created a solid barrier. If the water soaks in and creates a dark spot, the stone is still thirsty and needs another coat.
This simple test is your go-to diagnostic tool. Performing it once a year on different areas will tell you exactly when it's time to reseal, taking the guesswork out of maintenance.
Building a Long-Term Maintenance Plan
A great seal is your foundation, but consistent maintenance keeps it performing. The most critical rule is to always use pH-neutral cleaners made for natural stone. Average household cleaners are often too acidic or alkaline and will strip the sealer, leaving your stone vulnerable. Good general care and cleaning practices are non-negotiable.
Your resealing schedule depends on traffic and use.
- High-Traffic Areas: Kitchen countertops, busy entryways, and family room floors should be resealed every 1 to 3 years.
- Low-Traffic Areas: Bathroom vanities, fireplace surrounds, or decorative accent walls can often go 3 to 5 years or longer between applications.
Staying on top of this simple maintenance ensures your beautiful surfaces remain a stunning feature. Whether it's a single piece or you're using natural stone throughout your entire home, knowing how to protect it is key.
Frequently Asked Questions
Even with a guide, questions can arise. Here are answers to common inquiries we receive from homeowners and trade professionals about how to seal natural stone.
How often should I reseal my natural stone countertops?
For high-traffic surfaces like kitchen countertops, we recommend resealing every 1 to 3 years. For lower-traffic areas like a guest bathroom, you may only need to reseal every 3 to 5 years. The best way to be sure is to perform a water test annually; if water soaks in instead of beading, it's time to reseal.
Is sealing outdoor stone necessary in a coastal climate?
Yes, it is absolutely essential, especially in California coastal areas like Monterey or the Bay Area. Use a high-quality penetrating sealer with UV inhibitors to protect against moisture from fog and rain. This also helps prevent salt-air corrosion and sun-induced color fading, preserving your stone's natural beauty.
Will a sealer change the appearance of my stone?
A standard penetrating sealer is designed to be invisible, preserving the stone's natural look. However, if you want to alter the appearance, a color-enhancing sealer will deepen the tones for a "wet look," while a topical sealer can add a high-gloss or matte finish. Always test your chosen sealer on a small, inconspicuous area first.
What happens if I use the wrong cleaner on my sealed stone?
Using the wrong cleaner is the quickest way to undo your work. Cleaners containing acid (like vinegar or lemon) or harsh chemicals (like ammonia) will break down and strip away the sealer. This leaves your beautiful stone exposed to stains and etches. Always use a pH-neutral cleaner specifically formulated for natural stone.
How do I know if my stone needs to be sealed in the first place?
The water test is the easiest way to check. Sprinkle a few drops of water on the surface and wait a few minutes. If the water beads up tightly, the stone is well-sealed. If the water absorbs into the stone and creates a dark spot, it is porous and needs to be sealed to prevent staining.
Your stone is a major investment in your home's character and value. A little protection goes a long way toward making sure it lasts a lifetime. If you have more questions or need help choosing the perfect stone for your next project, the experts at Carmel Stone Imports are here to help.
Visit one of our California showrooms or contact our team today!
