Installing a natural stone backsplash is more than just a functional upgrade; it’s an opportunity to infuse your kitchen or bathroom with timeless character and lasting value. This guide provides a step-by-step process for a flawless installation, from selecting the perfect stone for your Bay Area home to applying the final coat of sealer.
Achieving a professional finish hinges on three key stages: preparing the wall meticulously, planning your layout with care, and using the right techniques for your chosen stone.
Why a Natural Stone Backsplash is a Smart Investment
A natural stone backsplash is a high-impact project that delivers timeless elegance and a significant boost to your home's value. This isn't just an aesthetic choice; it's a strategic one that aligns with current design trends.
The demand for natural materials is soaring. The global market for natural stone slabs hit $47.7 billion in 2022 and is projected to reach nearly $69.2 billion by 2030, according to this Grand View Research report. This growth reflects a clear shift among homeowners in regions like Monterey and Palo Alto toward authentic, high-quality materials that offer unique beauty and longevity.
Choosing the Right Stone for Your Space
Your first step is selecting a material that complements your home's design and suits your lifestyle. Every stone has a unique personality, from the dramatic veining of marble to the rustic texture of travertine.
- Marble: The epitome of classic luxury. Its porous nature requires diligent sealing to prevent stains, especially behind a busy stovetop.
- Granite: A true workhorse. Known for its incredible durability and resistance to heat and scratches, it's a practical choice for active kitchens.
- Travertine: Perfect for creating a warm, old-world feel, ideal for coastal California or Mediterranean-inspired designs. Like marble, it must be sealed.
- Limestone: Offers soft, muted tones for a serene aesthetic. It is a softer stone, making it susceptible to etching from acids like lemon juice.
The stone you choose sets the stage for the entire project. We always recommend ordering samples from Carmel Stone Imports. Seeing how different materials look in your home's unique lighting makes a huge difference in ensuring the finished backsplash is exactly what you envisioned.
Understanding the practical differences between materials is crucial. For instance, while granite and quartz are both popular, they vary in maintenance. Our guide on whether quartz is better than granite offers a detailed comparison.
Essential Tools and Materials Checklist
Nothing slows down a project like a mid-job run to the hardware store. Gather these items beforehand to ensure a smooth installation from start to finish.
| Category | Essential Items | Pro Tip |
|---|---|---|
| Preparation & Layout | Tape Measure, Level, Chalk Line, Pencil | Use a laser level for layout. It makes finding a perfectly level line across an uneven wall much easier. |
| Cutting & Setting | Wet Saw with Diamond Blade, Notched Trowel, Sponges | The notch size on your trowel depends on the tile thickness. Check the adhesive manufacturer’s recommendation. |
| Adhesive & Grout | Thin-set Mortar (for natural stone), Unsanded Grout, Grout Float | Always use a thin-set specifically rated for natural stone. Standard tile mastic can stain porous stones like marble. |
| Sealing & Finishing | Penetrating Stone Sealer, Painter’s Tape, Drop Cloths, Microfiber Cloths | Apply sealer with a foam brush for even coverage and wipe away any excess before it dries to avoid a hazy finish. |
Having this checklist completed means you’re ready to transition to the hands-on work without any interruptions.
Preparing Your Walls for a Lasting Installation
The long-term success of your stone backsplash depends entirely on what happens before a single tile is set. A pristine, stable surface isn't just a nice-to-have; it's the non-negotiable foundation for an installation that will look professional and stand the test of time.
Before mixing mortar, ensure your wall is impeccably clean. This is especially true behind a stovetop, where a film of grease can form. Use a degreasing cleaner to scrub the entire area, then let it dry completely.
Inspecting and Repairing the Surface
Once clean, run your hand across the wall to feel for any bumps, dings, or divots. Even a tiny imperfection can cause a tile to sit unevenly, creating a domino effect across your layout.
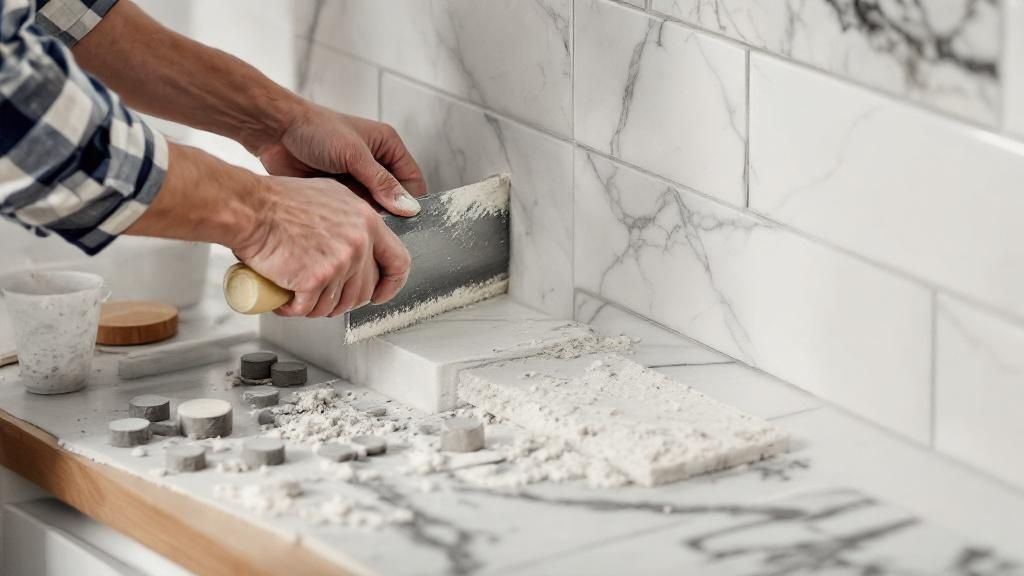
- Fill Imperfections: Use a putty knife and spackling compound to fill any nail holes or cracks in the drywall.
- Sand Smooth: After the spackle is fully cured, sand the patches with fine-grit sandpaper until they are perfectly flush.
- Wipe Clean: Wipe away all sanding dust with a damp cloth. A dusty surface will compromise the bond with your thin-set mortar.
This process is critical when installing stone backsplash tiles, as natural stone doesn't hide surface variations well.
Priming and Waterproofing
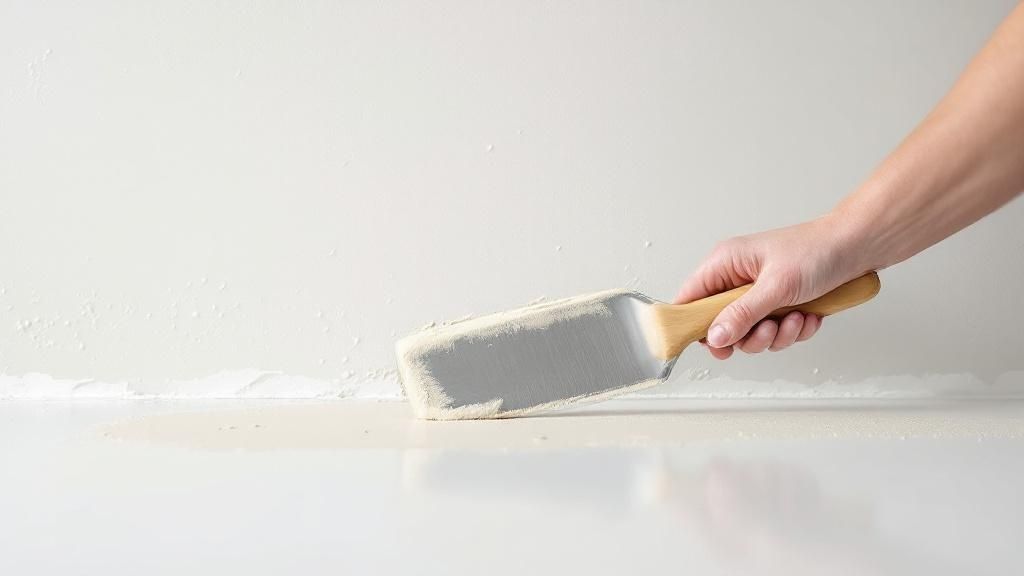
With a clean, smooth wall, you're ready to prime. A quality primer seals fresh drywall patches and creates a uniform surface, preventing the drywall from absorbing moisture from the thin-set too quickly.
A common mistake is skipping primer on already painted walls. A fresh coat of primer guarantees maximum adhesion and consistent curing time for your mortar, regardless of the old paint finish.
If your backsplash is in a high-moisture area—a common concern in many coastal California homes—or behind a sink, consider an extra layer of defense. Applying a waterproofing membrane creates a robust barrier against water intrusion.
This principle of moisture protection is also key in other wet areas. For more on this, see our guide on choosing the best bathroom vanity countertop materials. These prep steps build a professional-grade foundation, ensuring your stone backsplash remains secure and beautiful for years.
Mastering the Layout and Dry-Fit
Experienced tile setters know that a stunning stone backsplash is all about the layout. Taking the time to map out tile placement before applying adhesive is what separates a decent job from a professional one. This planning guarantees a balanced design and helps you avoid awkward, sliver-like cuts.
First, find the centerline of your backsplash area by measuring the horizontal length and marking the middle. Use a level to draw a faint vertical line from the countertop up. This line is your guide for creating a visually pleasing layout.
Planning Your Tile Placement
With your centerline marked, it’s time for a critical step: the dry-fit. Lay a drop cloth on your countertop and arrange your tiles exactly as you envision them on the wall. This is your chance to see how the unique colors and veins of each stone piece interact.
This is especially important for stones with dramatic patterns, like Calacatta marble or a richly veined onyx. You can artfully arrange tiles to create a flowing pattern or mix them for a dynamic effect. The goal is to avoid placing two nearly identical or clashing pieces next to each other.
Pro Tip: As you finalize your layout, lightly number the back of each tile with a pencil. This creates a simple map, so when you start setting the tiles in mortar, you'll know exactly where each piece goes.
Working with Spacers and Obstacles
While laying out your tiles, use spacers to maintain consistent grout lines. For backsplashes, 1/8-inch or 1/16-inch spacers are most common. This small detail makes a massive difference in the final, polished look.
You also need to account for obstacles like electrical outlets. During the dry-fit, measure and mark where these will land on your tiles. This allows you to plan your cuts ahead of time, similar to the precision required when you learn how to template countertops.
This level of detailed work is what discerning homeowners want. The market for backsplash and wall tile services was valued at USD 15.2 billion in 2024 and is expected to surge to USD 25.8 billion by 2033. This growth shows just how much people value well-executed installations. You can read the full market report for more insights.
Applying Adhesive and Setting Your Stone
With your walls prepped and your layout perfected, it's time to bring your vision to life. The process of installing the stone backsplash now moves to the wall, where precision and the right materials are paramount.
The right adhesive is critical for the final look and longevity of your backsplash. For nearly any natural stone, a high-quality, polymer-modified thin-set mortar is the best choice. It is especially important to use a white thin-set mortar for lighter stones like Carrara marble or pale limestone, as gray mortar can "shadow" through and dull their color.
Mixing and Applying the Mortar
Your goal when mixing thin-set is a smooth, creamy consistency like peanut butter. It should hold its shape on your trowel without dripping. Always follow the manufacturer’s instructions, adding powder to water to prevent clumps.
Once mixed, use the flat side of your notched trowel to apply a thin "skim coat" of mortar to a small section of the wall. Then, switch to the notched side and comb through the mortar at a 45-degree angle. This creates uniform ridges for maximum adhesion.
A common rookie mistake is spreading adhesive over the entire wall at once. Work in small, 2-3 square foot sections to ensure every tile is set into fresh, sticky mortar before it starts to skin over.
The following visual shows the precision required when cutting stone, a process just as important as setting it correctly.
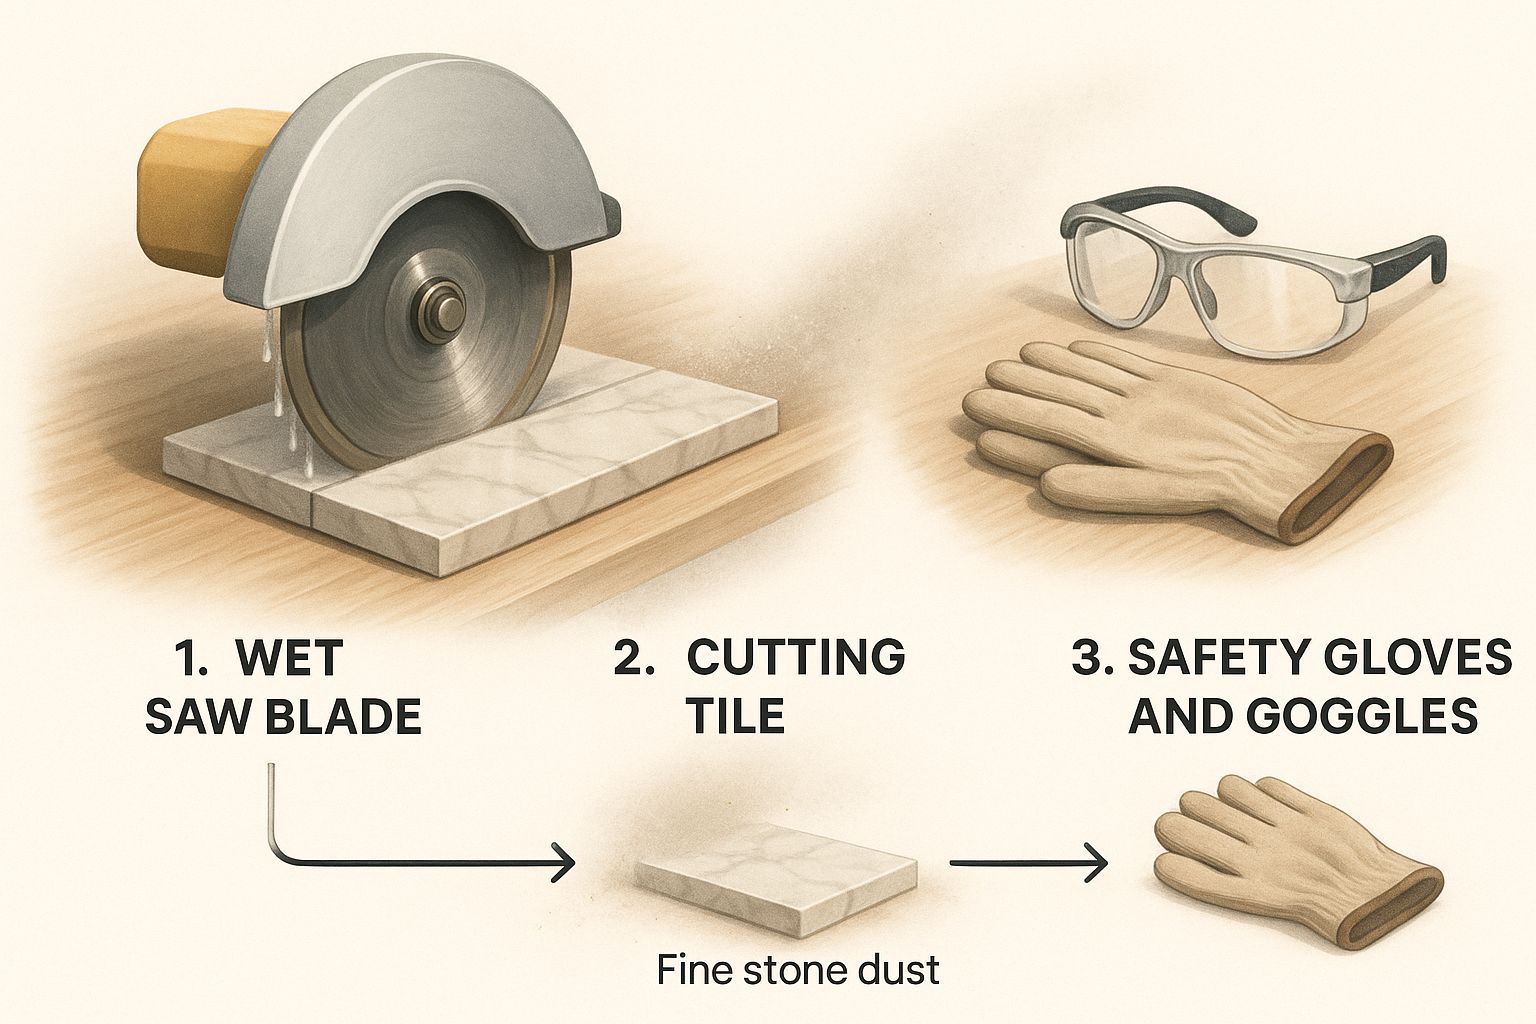
This image highlights the meticulous nature of working with natural stone, where every cut must be planned and executed for a flawless fit.
Setting Your Stone with Care
Begin setting your tiles according to your planned layout, starting from the centerline and working outward. Press each tile firmly into the mortar with a slight twisting motion to collapse the ridges and ensure full coverage. Use tile spacers as you go to maintain consistent grout lines.
For heavier or larger stone tiles, back-buttering is an essential technique. This means spreading a thin layer of mortar onto the back of the tile before pressing it onto the wall. This dual-adhesion method creates a strong, permanent bond, similar to the principles used when installing quartz countertops.
Grouting and Sealing for Long-Term Beauty
With the hard work done, it's time for the final touches that make the project shine. Grouting and sealing transform set tiles into a polished, professional feature, protecting your investment for years to come.
Your first decision is the grout. The color can either blend in for a subtle look or create a bold contrast. For instance, a dark charcoal grout with light Carrara marble delivers a modern graphic effect popular in Bay Area homes, while a soft off-white grout with tumbled travertine enhances the rustic charm seen in Monterey or Carmel Valley properties.
Here’s a critical tip: for natural stone, always use an unsanded grout. Sanded grout will scratch the delicate surface of materials like polished marble or limestone.
Applying and Cleaning Grout
Once your grout is mixed to a smooth consistency, apply it with a rubber grout float held at a 45-degree angle. Press the grout firmly into the joints, swiping from multiple directions to eliminate air pockets.
After applying, timing is everything. Let the grout set for 15 to 30 minutes before cleaning.
- Initial Wipe-Down: Use a damp—not soaking wet—grout sponge to gently wipe excess grout off the tile faces. Rinse your sponge often in clean water.
- Final Haze Removal: After a few hours (2-3 hours), you will likely notice a faint haze. Buff the tiles with a clean, dry microfiber cloth until they shine.
The most common mistake is using too much water during the initial cleanup. This can pull pigment from the grout, leading to a splotchy color, or weaken the grout by washing away cement before it cures.
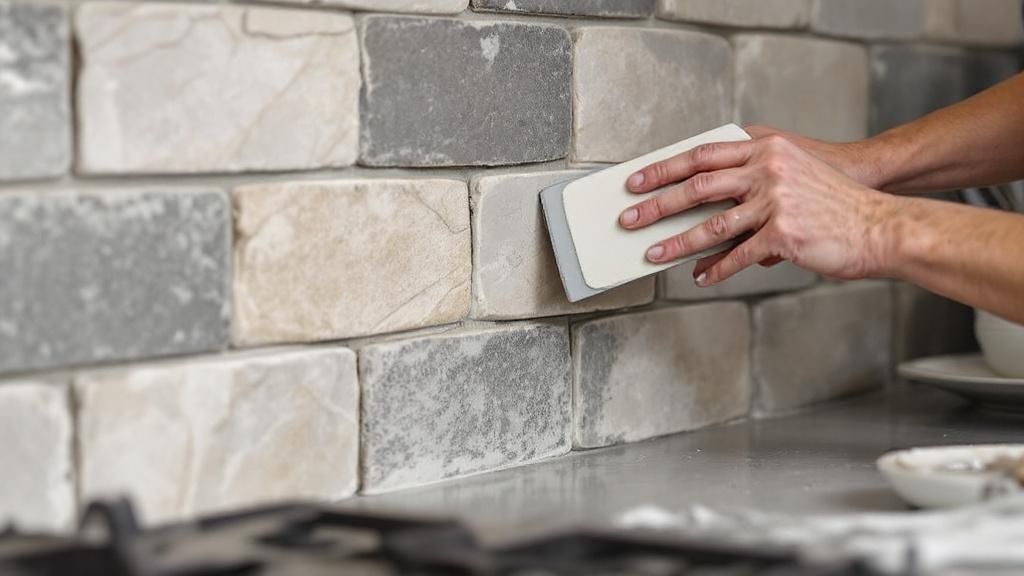
The Critical Importance of Sealing
For any porous natural stone, sealing is non-negotiable. This final step guards your stone against stains from splattered sauces and moisture. Materials like limestone and travertine are especially absorbent and require a high-quality penetrating sealer to create an invisible shield without changing their natural look.
This finishing touch is part of a massive industry. The global market for backsplash and wall tile services was valued at USD 21.4 billion in 2023 and is projected to nearly double by 2033, according to DataHorizzon Research. This growth highlights how much homeowners value aesthetic upgrades that add lasting value.
For long-term care, proper cleaning is key. Resources like this guide on Mastering Ceramic vs. Porcelain Grout Cleaning offer helpful principles that also apply to stone.
Achieve Your Vision with Carmel Stone Imports
A successful project is about thoughtful planning, precise execution, and an appreciation for the stone itself. From prepping the walls to laying down the final coat of sealer, each step builds on the last to create a durable and stunning backsplash.
The real magic happens when your vision is paired with stone of genuine character and quality. This combination ensures your backsplash isn't just an addition, but a true centerpiece of your home's design.
Ready to start your project? The team at Carmel Stone Imports is here to help. We invite you to visit our showrooms in Palo Alto or Monterey to explore our extensive collection of premium natural stone, sourced from the world's finest quarries. Let our experts provide the guidance you need to select the perfect material that brings your vision to life.
Frequently Asked Questions
As you prepare to start your project, a few final questions may arise. We often hear from homeowners across the Bay Area working through the details of their stone backsplash installation. Here are some of the most common questions we receive.
For those planning this project as part of a larger build, understanding where it fits in the custom home building process can help with scheduling and coordinating trades.
What is the best adhesive for a natural stone backsplash?
For securing natural stone, a high-quality, polymer-modified white thin-set mortar is the best solution. A premium thin-set provides the superior bond strength needed to hold the stone's weight for decades. The "white" color is crucial for lighter, translucent stones like Carrara marble, as standard gray mortar can darken the stone from behind.
Do I really need to seal my stone backsplash?
Yes, absolutely. Sealing is a non-negotiable step for any porous natural stone in a kitchen environment. Stones like travertine, marble, and limestone can absorb liquids like cooking oil or wine, leading to permanent stains. A good penetrating sealer creates an invisible shield, protecting your investment without changing the stone's appearance.
Can I install a stone backsplash over existing tile?
While sometimes suggested as a shortcut, we strongly discourage tiling over old tile. This method can lead to poor adhesion, an awkwardly thick profile on your wall, and difficulties cutting around outlets. For a professional and lasting result, the only proper way is to remove the old tile and start with a clean, flat wall surface.
How long should I wait before grouting the stone?
Patience is key; wait at least 24 to 48 hours after setting the stone before you begin grouting. The thin-set mortar needs this time to cure and build its full strength. Grouting too early can trap moisture, compromising the bond and potentially leading to loose tiles later on.
How do I clean a natural stone backsplash?
For routine cleaning, use a pH-neutral cleaner specifically formulated for natural stone. Avoid acidic products like vinegar or citrus-based cleaners, as well as abrasive powders or scrubbers. These harsh agents can etch the stone's surface and strip away its protective sealer, leaving it vulnerable to stains and damage.
By following these guidelines for installing stone backsplash, you're setting yourself up for a stunning result that you'll love for years. When you’re ready to find that perfect material, come see us. The experts at the Carmel Stone Imports showrooms in Palo Alto and Monterey are here to help you select the ideal stone for your project.
