Stone veneer is a fantastic way to add timeless beauty and a major boost in curb appeal to your home. It can transform a plain wall into a stunning feature, whether you're aiming for rustic charm or modern elegance. This guide is designed to walk you through the entire process, breaking down the steps so California homeowners and contractors in areas like Monterey or Palo Alto can achieve a professional, long-lasting finish.
From Vision To Reality: Transforming Your Home With Stone Veneer
Starting a stone veneer project is genuinely exciting. Whether you're picturing a cozy, rustic fireplace or a sleek, modern exterior that fits right in with Bay Area aesthetics, stone can make it happen. The look of hand-chiseled ledgestone or the smooth feel of split-face travertine can completely transform a space.
It's no surprise that stone veneer is catching on with homeowners and builders who have an eye for design. The market backs this up—the global stone veneer market was valued at around USD 1.5 billion in 2022 and is expected to hit USD 4.31 billion by 2033, according to Precedence Research. This surge shows a real shift toward materials that are not only beautiful but also built to last.
Planning Your Project For Success
A great installation starts long before you mix the first bag of mortar. Solid planning is the key to keeping your project on track and on budget. If this is part of a larger renovation, you might want to look at a comprehensive house renovation checklist to make sure nothing gets missed.
Think of this guide as your roadmap. We’ll cover everything from getting the surface ready to the final, finishing touches, giving you the confidence and the know-how for a flawless result.
Here's what this stone veneer installation guide will cover:
- Material Selection: How to pick the right stone that suits your design and can handle the local Monterey climate.
- Surface Preparation: The essential steps for creating a solid, durable base for your veneer.
- Setting Techniques: The best methods for arranging and adhering the stone for a natural, professional pattern.
- Finishing Touches: Grouting and sealing tips to protect your work and complete the look.
The very first decision is choosing the right material, a choice that impacts everything from aesthetics to installation methods. To get a head start, check out our guide on how to choose the right natural stone, which breaks down the unique qualities of the stones we offer at Carmel Stone Imports.
Assembling Your Tools and Materials
A successful stone veneer project begins well before the first stone touches the wall. Gathering your equipment and materials beforehand is what separates a frustrating job from a smooth, professional installation. Having everything within arm's reach means you can maintain momentum and focus on craftsmanship.
This isn't just about making a pile of tools; it's about understanding what each one does and why it’s essential. The right gear can be the difference between a DIY struggle and a stunning finish that adds genuine value to your home.
The Essential Tools and Materials Checklist
To ensure you're fully prepared, we’ve put together a comprehensive checklist. Think of this as your pre-flight inspection; go through it and make sure you have every item before you mix your mortar.
| Item | Category | Purpose and Pro Tips |
|---|---|---|
| Notched Trowel | Core Tools | For applying an even layer of mortar to the scratch coat. The notches create ridges that improve adhesion. |
| Pointing Trowel | Core Tools | A smaller trowel that's perfect for pushing mortar into the joints between stones and shaping them for a clean look. |
| Angle Grinder or Wet Saw | Core Tools | Essential for cutting stones to fit around obstacles like outlets, windows, and corners. Use a diamond blade for clean cuts. |
| 4-Foot Level | Core Tools | Absolutely vital for keeping your courses straight. Don't eyeball it—even a slight error will be noticeable over a large wall. |
| Chalk Line | Core Tools | Works with your level to snap long, straight reference lines across the wall, guiding your installation. |
| Stiff Wire Brush | Core Tools | Use this to scrub the back of each stone before applying mortar. This removes dust and debris that can weaken the bond. |
| Weather-Resistant Barrier (WRB) | Materials | You need two layers. The first drains moisture away, and the second (sacrificial) layer protects it from the mortar. |
| Metal Lath | Materials | This is the skeleton for your mortar. It creates a rigid, textured surface for the mortar and stone to cling to. |
| Type S or N Mortar | Materials | Type S is stronger and ideal for exterior work. Type N is a great general-purpose mix for many interior projects. |
| Grout Bag | Finishing | Similar to a pastry bag, this tool makes it much easier to apply grout or mortar neatly into the joints. |
| Jointing Tool | Finishing | Used to press and smooth the mortar in the joints for a professional, concave finish. |
| Hammer & Masonry Chisel | Shaping | Good for making small adjustments or creating a more rustic, hand-chipped edge on a stone. |
| Safety Glasses & Gloves | Safety | Non-negotiable. Protect your eyes from flying debris when cutting and your hands from the abrasive mortar. |
Having these items ready will save you from frustrating mid-project runs to the hardware store and allow you to work efficiently.
Choosing the Right Materials for a Lasting Job
The materials you select are as critical as your tools. For homes in diverse California climates—from the damp air in Monterey to the dry heat of inland areas—your choices in weatherproofing and adhesion are what make an installation last.
The number one cause of stone veneer failure is a weak bond, which almost always comes down to poor surface prep or using the wrong materials. Never cut corners on your weather-resistant barrier or mortar mix. For the mortar, Type S is the go-to for most exterior projects because of its superior strength, while Type N mortar is typically sufficient for indoor applications.
How to Estimate Your Material Needs
Running out of stone veneer halfway through a wall is a project-killing mistake. To avoid this, measure your project area carefully and then add a buffer.
A solid rule of thumb is to order 10% to 15% extra material beyond your calculated square footage. This "waste factor" covers cuts, accidental breaks, and pieces you might not like the look of. That extra material is cheap insurance against delays and ensures your stone comes from the same color batch.
For precise measurements, especially around unique features, the approach is similar to other stonework. You can get helpful pointers from our guide on how to template countertops, as that same level of detail will serve you well here.
Preparing Your Surface for a Lasting Finish
Proper surface preparation is the single most critical factor for a stone veneer project that lasts. This is the foundation of your entire installation. Get this part right, and your new stone facade will stand up to anything, especially the diverse climates across California.
It doesn’t matter if you're working with plywood, concrete, or an old painted wall—the principles are the same. The surface must be clean, structurally sound, and ready to create a powerful, permanent bond with the mortar.
The Non-Negotiable Weather-Resistant Barrier
For any exterior job, managing water is everything, especially in coastal spots like Monterey or the Bay Area. Your first line of defense is a weather-resistant barrier (WRB). This isn't just a good idea; it's a must-do for protecting your home's structure.
On wood-framed walls, you need two layers of a high-quality WRB:
- The Primary Layer: This is your main shield, designed to drain away any water that gets behind the stone.
- The Sacrificial Layer: This second layer goes over the first, protecting the primary WRB from the alkaline mortar.
Install the WRB from the bottom up, overlapping each sheet by at least two to four inches, shingle-style. This forces water to flow down and out. Also, install a weep screed at the base of the wall to create a small gap for any trapped moisture to escape.
Installing the Metal Lath for Structural Grip
Once the WRB is in place, it’s time for the metal lath. This galvanized metal grid is the skeleton that your mortar and stone will cling to. It provides the essential mechanical grip needed to support the system's weight.
Securely fasten the lath to the wall framing every six inches using corrosion-resistant screws or nails that penetrate the studs by at least three-quarters of an inch. Overlap the lath seams by at least one inch and wrap it continuously around corners to maintain structural integrity. A poorly secured lath will inevitably lead to cracks and failure.
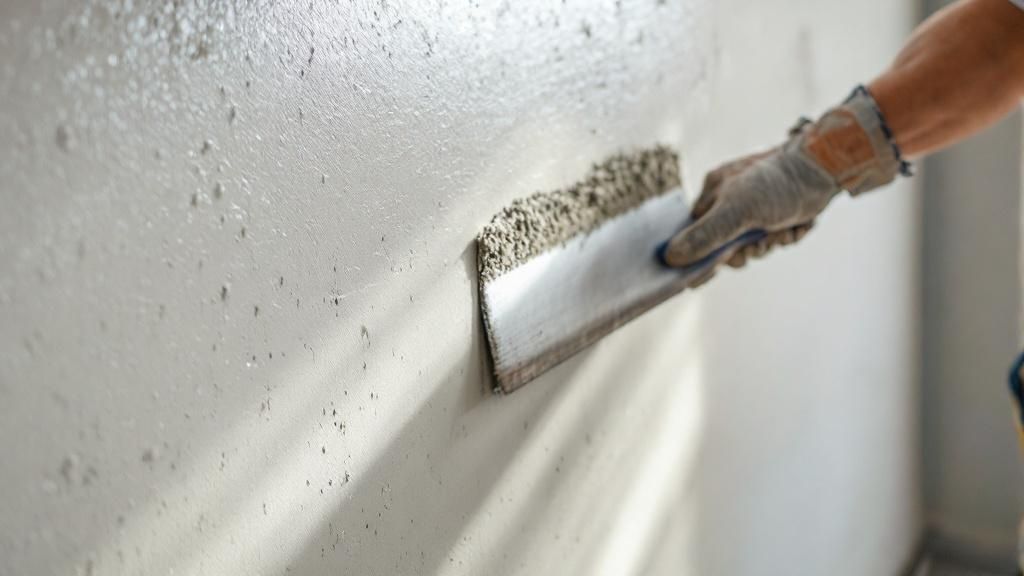
Applying the Perfect Scratch Coat
The scratch coat is a layer of mortar troweled over the metal lath. It embeds the lath to create a solid base and provides a rough, textured surface for the stone’s setting mortar to grab onto.
Mix your Type S mortar to a consistent, workable paste and apply it over the lath to a uniform thickness of about half an inch. The main goal is to completely cover the metal mesh. While the mortar is still soft, "scratch" the surface with a plasterer's rake or notched trowel, scoring horizontal lines across the wall. Let the scratch coat cure for at least 24 to 48 hours before setting any stone.
Ultimately, whether you choose engineered stone versus natural stone, it will only adhere as well as the surface beneath it.
Mastering the Art of Setting Stone Veneer
Once your surface is prepped and ready, the fun really starts. Setting stone veneer is equal parts art and science, blending a good eye for composition with a methodical approach. Patience is your best friend here.
This part of our stone veneer installation guide is all about technique. We’ll get into everything from laying out your pattern and mixing the perfect mortar to setting each stone so it stays put for a natural, professional finish.
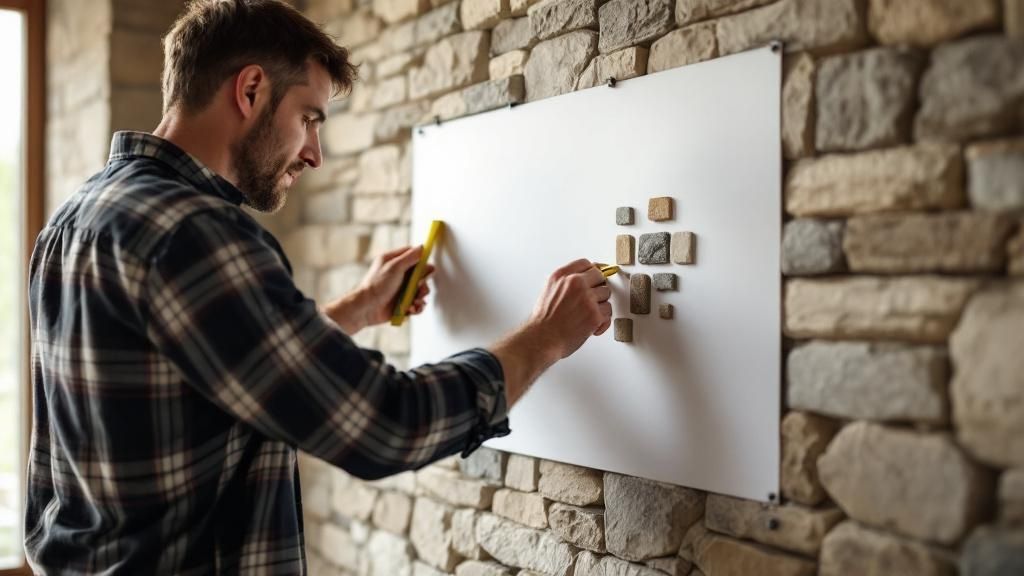
Crafting Your Pattern with a Dry Layout
Before touching a bag of mortar, the single most important thing you can do is a dry layout. Unpack several boxes of your stone veneer and arrange them on a large, flat surface. Seasoned pros never skip this step.
Spreading the stones out lets you see the full spectrum of colors, shapes, and sizes you're working with. It’s your chance to blend different tones, avoid unnatural color patches, and mix up sizes for a dynamic, random look. A good layout prevents the classic amateur mistake of placing all the big stones at the bottom and small ones at the top.
The Art of Mortar Application
With your pattern mapped out, it's time to mix the mortar. The consistency is critical for a strong bond. You’re aiming for a thick, creamy texture, something like peanut butter.
The go-to technique is back-buttering, which guarantees 100% mortar coverage on the back of every stone and prevents hollow spots that can trap water.
Here’s how to do it right:
- Scrub the Stone: Use a stiff wire brush to scrub the back of the stone, removing any dust or loose bits.
- Apply the Mortar: With a pointing trowel, slather an even layer of mortar—about a half-inch to three-quarters of an inch thick—across the entire back of the stone.
- Press and Wiggle: Push the stone firmly onto the scratch coat with a slight wiggling motion to collapse mortar ridges, squeeze out air pockets, and create a solid bond.
A little bit of mortar oozing out around the edges is a good sign; it means you've achieved complete coverage.
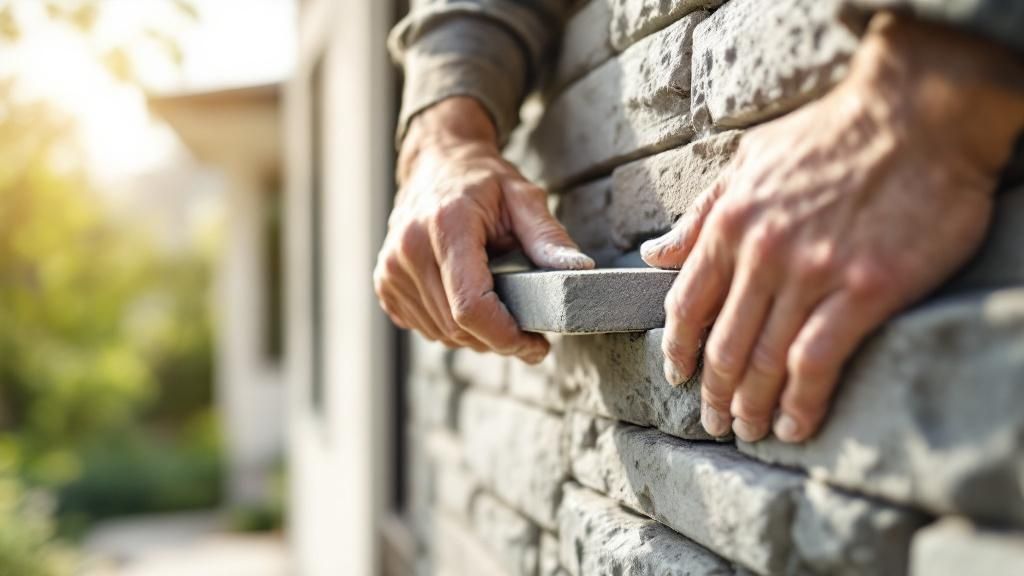
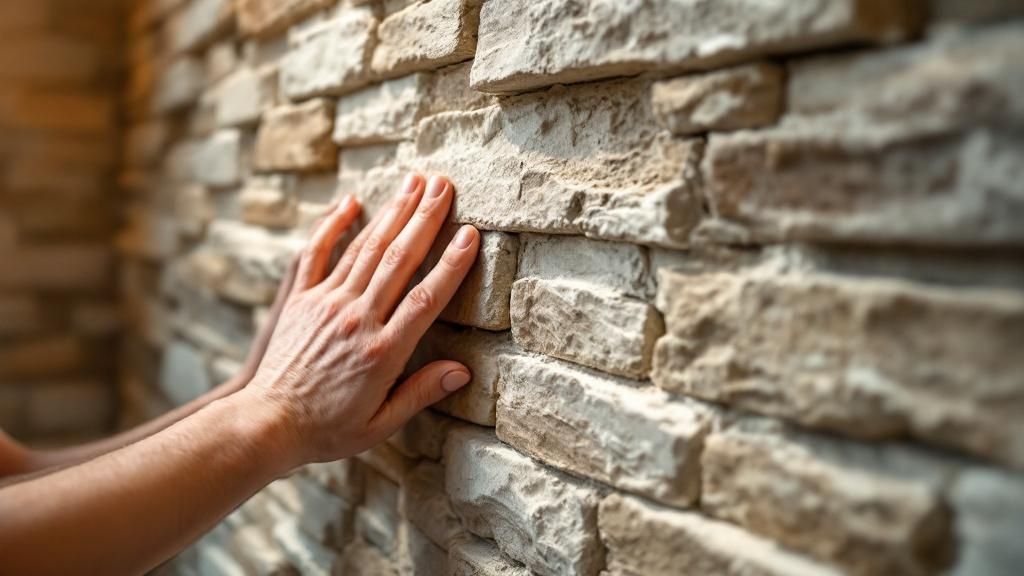
Setting Stones for a Natural Look
Always start your installation at the corners and work your way in. Corner pieces are specially made to wrap around the edge, giving you an authentic, full-stone wall appearance. Once your corners are set, fill in the wall between them, working from the bottom up.
As you place each piece, try to keep a consistent joint width. Keep your level handy and check your work every few rows to ensure your lines are straight. Mix up stone sizes and stagger the vertical joints to avoid "running" patterns that look unnatural.
You'll need to cut some stones to fit around outlets, windows, or at the top of the wall. An angle grinder with a diamond blade or a wet saw will give you the cleanest cuts. This level of precision is also discussed in our article, a comprehensive guide to choosing and installing countertops.
The Finishing Touches: Grouting and Sealing
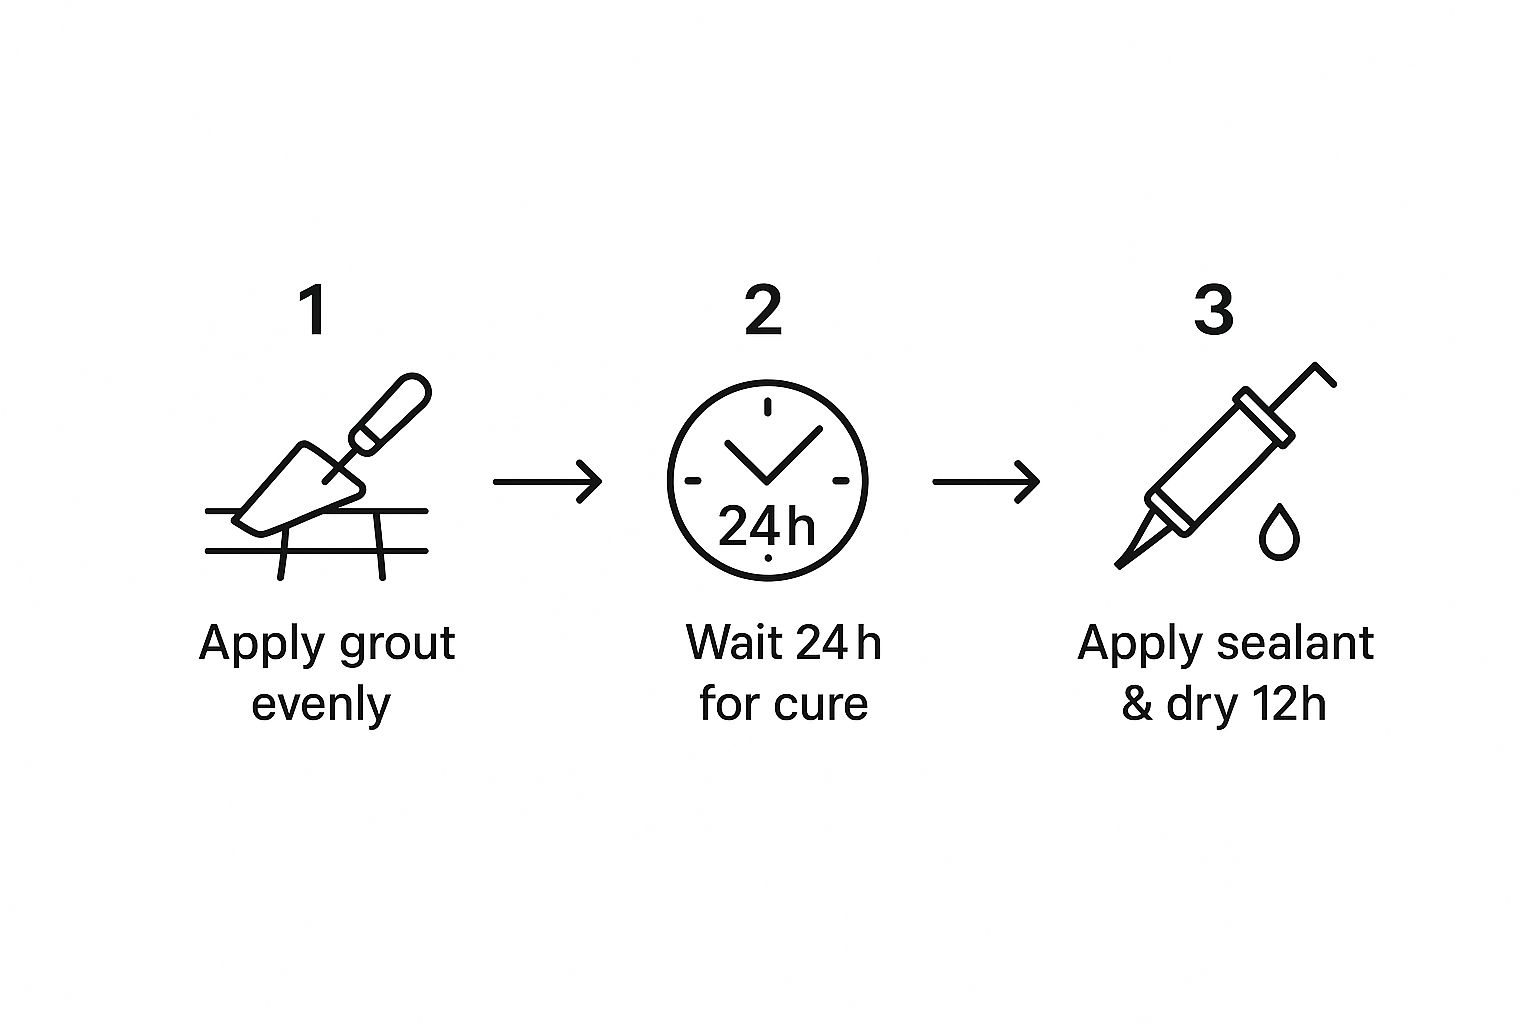
With the stones set and cured, you’re moving into the final phase. Applying the finishing touches—grouting, sealing, and cleaning—is what separates a decent job from a professional masterpiece. These last steps define your wall's character and ensure it looks stunning while standing up to the elements for years to come.
Grouting with Precision and Style
Grouting does more than just fill the gaps; it locks the stones together and plays a huge role in the final look. The style you choose can dramatically change the vibe of the wall.
You have two popular techniques to choose from:
- Full-Grouted (or Over-Grouted) Look: This method involves filling the joints completely, creating a more uniform, traditional appearance.
- Raked-Back (or Recessed) Look: Here, you strike the grout back from the stone face, creating deeper joints that cast dramatic shadows and add depth.
No matter which style you pick, a grout bag is your best friend. It allows you to apply grout deep into the joints with precision, minimizing mess on the stone faces. Wait for the grout to become “thumbprint hard” (usually 30 to 60 minutes), then use a jointing tool to strike the joints, compacting and smoothing the grout.
The Critical Role of Sealing
Here in California, with our diverse climates from the humid coast of Monterey to the dry heat of Palo Alto, sealing your stone veneer is non-negotiable. A quality sealer is an invisible shield against moisture and stains.
Sealing stops water from getting into the stone and mortar, preventing efflorescence (the chalky white salt deposit) and guarding against stains from dirt and pollen. To document your project's transformation, using construction photo documentation software can be a great way to ensure quality control.
Choosing the right sealer is key. Penetrating sealers soak into the stone without changing its natural look, while film-forming sealers create a surface layer that might add a slight sheen. Always test your sealer on a spare stone first to ensure you like the result.
The Final Cleanup Process
No matter how careful you are, some mortar or grout haze is bound to happen. The very last step in this stone veneer installation guide is a thorough cleanup. Wait at least 24 to 48 hours after grouting before you begin.
First, use a stiff-bristled brush (not wire) to knock off any large chunks of mortar. For the stubborn haze, use a cleaning solution made for manufactured stone or a diluted mix of one part vinegar to ten parts water. Apply it sparingly in small sections, scrub gently, and rinse immediately and thoroughly with clean water. Never use muriatic acid, as it can permanently ruin your stone.
Frequently Asked Questions
Even with a detailed guide, questions are a natural part of any hands-on project. This section tackles common inquiries from homeowners and contractors in the Bay Area, providing clear, practical answers to help you move forward with confidence.
1. Can I install stone veneer over existing brick or stucco?
Yes, you often can, but the surface condition is critical. It must be clean, structurally sound, and free of any paint or sealant that could prevent adhesion. For stucco, it is often better to install a new weather-resistant barrier, metal lath, and scratch coat to guarantee a lasting bond. Always check local building codes in your specific California city, as requirements can vary.
2. What is the difference between natural and manufactured stone veneer?
Natural stone veneer is real quarried stone, like limestone or travertine, sliced thin. Each piece is unique, offering unmatched authenticity. Manufactured stone is a concrete-based product cast in molds made from real stone, making it lighter and more budget-friendly. The right choice depends on your aesthetic goals, project location, and budget.
3. How does weather affect my installation timeline?
Weather is a huge factor. Avoid installing stone veneer on days below 40°F or above 90°F. During hot, dry spells common to inland California, you'll need to periodically mist the wall and stones to keep the mortar from curing too quickly, which can create a weak bond. In damp coastal climates like Monterey, a flawless weather-resistant barrier is your primary defense.
4. How long should I wait before grouting the stones?
Patience is key. You must wait at least 24 to 48 hours after setting the last stone before grouting. This waiting period allows the setting mortar to cure properly and lock the stones firmly to the wall. Grouting too soon risks knocking stones loose and compromising the entire installation.
5. Is sealing stone veneer always necessary?
While not mandatory for every situation, sealing is highly recommended, especially for exterior projects or high-moisture interior areas like a kitchen backsplash. A quality sealer protects against water penetration, efflorescence (chalky white deposits), and stains. It preserves the stone’s color and makes it significantly easier to clean. For more project tips, see our article on key elements to remember when remodeling your home.
At Carmel Stone Imports, we believe a successful project is built on quality materials and expert knowledge. If this guide has inspired you to transform your space, we invite you to explore our incredible collection of natural and engineered stone.
Visit one of our showrooms in Palo Alto, Carmel, or Sand City to see the possibilities for yourself, or contact our team today for a personalized consultation.
